creativity
Heyday Stripes
So something really fun happened this summer. I’ve been following the lovely Juliana from http://kleidermache.blogspot.com/ for quite a while, and when she posted a fabric destash on Instagram, I couldn’t resist getting a few pieces for myself. It’s not every day you get a chance to lay your hands on vintage fabric from Germany you know (especially in a travel-restricting pandemic..!!) and a few of those gorgeous fabrics were literally calling my name.

The first one that drew my eyes in was the floral on the left side, then decided to add a stiffer cotton stripe canvas to the package. At first I really thought I would use the stripes to make a pair of loose, wide legged beach pants. I was pretty sold on the idea, and while waiting for the package I started browsing patterns, trying to find something that would fit the image I had in my head.
But then, I completely changed my mind when I received the package. First, let me just say that when I got this in the mail, it felt even more exciting than Christmas! So much joy and excitement and happiness! Also, knowing how much I love pattern and stripes, Juliana added a few more in the mix, and a lovely note. I have no words to express how grateful I am! This package was everything I could have ever wanted and some more!
So once I could hold the stripes fabric in my hands, and after turning it over a few times and giving it a good wash, somehow, it just screamed “Dungarees” to me. I don’t know why… I don’t have any dungarees in my wardrobe. That’s not something I usually really wear. And I didn’t even have a dungarees pattern in my collection. I’ve been very well resisting the dungarees trend so far! But this fabric… Somehow… Was really calling for it. And in the same time period, a friend of mine also post a super cute picture of herself in blue dungarees. So that was it… I was sold. It had to be dungarees!
I had seen before the Heyday Dungarees pattern from MBJM, and I thought this might be a good start for what I wanted to do. I thought the loop and straps closure on the front was the cutest thing ever, and the pattern seemed simple enough. I did make a couple changes though, especially on the pockets. I’m not a huge fan of patch pockets on the front, so I dropped the chest pocket altogether and slightly altered the pattern to create side pockets instead. I also cropped the leg as I was working on a limited amount of fabric and didn’t have enough for a full legged one. With all that being said, here it is folks, in all it’s glory! My vintage stripes dungarees!


Coral Cropped Top
How’s your summer been so far folks? For me, it’s been filled with a lot of sun and warmth, some time with friends and a whole lot of sewing, knitting and home decoration projects, and I’ve been loving every minute of it! I finished last week a sweater called Diane, which is a free pattern from Berroco. And although it didn’t turn out quite like I expected, I must say that I am quite satisfied with the finished garment. The yarn I’m using is a wonderful cotton and linen blend, Knit Pick’s Lindy Chain in colour Conch.


You may know this about me (or not) but I am a very intuitive knitter… Which is the nice way of saying that I dont really ever follow patterns to a T, nor do I usually swatch or block my projects, aside from lace shawls. I am very much the no-fuss type that will knit a sweater in natural plant fibers like bamboo, cotton or linen and will just plainly send it washer and dryer with all my other clothes. It shall fall however it will fall!
So once I decided to make this sweater, I had a very quick read through the pattern and looked at the pictures, and made a few decisions. I was using the same yarn weight as the pattern called for to I first decided to knit this sweater in the smallest size (36″ bust), use a single 3.5 mm needle size throughout instead of switching from 3.25 to 3.75 and that I would compensate the change of needle size by adding a few stitches to the body front and back, as I was obviously going to be working on a different (more than likely tighter) gauge. Since I don’t like seams in my sweaters, I also decided to cast on the front and back stitches using a provisional cast-on, and to attach front and back with a kitchener’s stitch at the end instead of a seam.
This sweater was a relatively quick knit, it took me a bit over a month of on and off knitting to complete, and I have to say I really wasn’t dedicating a lot of time to it. The instructions are clear and simple, and the pattern is easy to follow. As I was knitting through the body though, I had this strange impression that the body was much shorter than I had anticipated, looking at the pictures provided in the pattern. But I just decided to roll with it and see what it looked like once finished. As a side note, I also experienced issues with the bottom band and the neckband, as I think the pattern calls for way too many stitches to be picked up. It creates a very loose and shapeless band, which does not suit most projects very well. As such, I decided to pick up less stitches on the bottom band, and even less stitches on the neckband (all the details are provided on my project page).
Anyways I eventually reached the end of it and it is once I tried it on that I could confirm that this sweater was indeed very, very short on me – I had actually knitted a cropped top unknowingly. And you know, cropped tops are not really a thing in my wardrobe; as just like most women out there, I am very self-conscious about by stomach and my body. So what do I do? I still have/had a lot of yarn, so technically I could rip up the bottom band, pick up less stitches to create sort of a fitted band and knit it longer. That would create kind of a 50s style top with looser top and fitted waist. That is/was definitely an option. But destiny gave me a cropped top. Maybe I should just use this as an opportunity to challenge my little petty insecurities and just roll with it, you know? It is cute sweater anyways. And it’s done. So I decided to leave it as is, and every time I wear it, it is a conscious choice to fight my own issues with self-image. And it may also be a lesson to read through patterns a bit more before I start a project… Who knows? Because after re-reading through the pattern, I noticed that it DOES indicate that the finished sweater in size 36″ is supposed to be 20″ long… Which is definitely cropped for me. #Oopsies
Cotton cable comfort
Weather recently has been yo-yoing between fresh spring and scorching hot summer with very little transition, and so it’s been a little difficult lately to just know what to expect or how to dress from day to day. As such, I’m actually very happy to present to you today a new very versatile addition to my wardrobe, this lovely cozy little cardigan that I’ve made as a test-knit for Beatriz Rubio from sambaknits, that should be published in Miss Babs fall 2020 collection.


The pattern calls for DK weight yarn, and I used Zooey Aran , a 60% cotton and 40% linen yarn from Juniper Moon Farm. Although technically a different yarn weight, it actually feels more like a light worsted yarn to me, and it actually knitted up to gauge almost perfectly so it worked out well. I knit the smallest size, and used almost all of the 5 skeins I had, a whopping total of 972 yards. I made no mods whatsoever, except for knitting 12 rows of collar instead of the 8 rows the pattern called for. I also think that if I had had any more yarn to spare, I would have made the collar even puffier as this design I feel would look simply amazing with a large folded collar.
It was a fairly easy knit, straightforward and well explained with a chart. The pattern is simply knitted and blocked as a big rectangle, then folded and seamed before adding the collar.
The finished cardigan is comfy, warm but still breathable and extremely soft! I know for sure that I will be wearing this a lot this summer on windy days or chill nights.
As you can imagine, the pattern is not out yet but I will make sure to link my project to the pattern page once it is.
Hope you guys are all safe and well!
Cobra Socks
Guys, I finally released this week a new sock pattern, may I present to you my Cobra Socks!


They’re cute and funky, fit like a glove and more important than anything they’re one of those fun summer projects you can carry with you just about anywhere!
The pattern is written for toe-up two-at-a-time, and features a german short-row heel as weel as simple mock cables running along the top of the foot and wrapping around the leg.
The pattern is written in 4 different sizes from 7.5″ to 9″ foot circumference and it is worked with sock weight yarn on size 2.5 mm needle. I first came up with this pattern in April using a couple skeins of Manos del Uruguay’s Serena yarn, and I loved them so much I made a second pair in May using Malabrigo Sock yarn to add to my rotation, because I seriously had those socks on my feet all the time! I thought other people might also like this design as much as I did so I decided to write up the pattern, get it tested and then… Voila! It is now out there for all those interested 🙂
Pinky swear
As the pandemic quarantine continues, I’ve been knitting a lot more recently, actually more than I’ve ever done in the past few years. Which is great, because I feel like I’ve been neglecting my hobbies recently, and by doing so also neglecting myself a little bit.
So far in 2020 (and we’re only 4 months in!), I’ve already knitted 4598 yards in 6 projects, which is more than what I did the entire 2019 year (3473 yards in 6 projects) and already very close to 2018, where I knit 4715 yards in 9 projects. Given that we’re only at the beginning of May and that there’s still no sign of the end of the work from home situation yet, I will more than likely surpass my 2017 stats (which came up to 5481 yards in 7 projects) and may potentially even reach my 2016 numbers by the end of the year, which came up to a wonderfully impressive 10 928 yards in 17 projects. 2015 and 2014 are also very close behind, with 9314 yards in 16 projects and 10 292 yards in 15 projects respectively.
Now numbers don’t tell the whole story though, as I’ve been picking up more hobbies in the past 4 years (namely here spinning, pottery and I’ve also been much more phyisically active and cooking at home more) so it’s totally normal that my knitting numbers now are lower than the ones I had 4 or 5 years ago (and for very good and healthy reasons). But I think it’s also safe to say that I may potentially have not been putting aside as much time for myself as I should have, leading me to experience more stress, anxiety and affecting my overall mental health. I think this time “on pause” as led me to realize this, and hopefully, I will learn from this moving forward. I will try very hard in the future not to neglect myself and my mental health, pinky swear!!!
So without further ado, I would like to show you today a couple of the projects I’ve completed recently, namely here this cute pair of mesh market bags. I used the Ilene Bag pattern from Hannah Mason and knitted them out of 4 skeins of Fibra Natura’s Sea Song cotton yarn in pink and a few grams of plain white unnamed cotton yarn I had in stash.


I worked the bottom of the bag and the mesh section in the pink, then switched a contrasting color for the ribbing and the handle. Each bag used about 1.9 skein of sea song (just about 207 yards) and 100 yards of white for the ribbing and handle, for a grand total of about 307 yards per bag.
I did make a few small changes to the pattern, namely here adding some plain rows before the mesh pattern and some ribbing rows at the end; all the details are on my project page as usual so feel free to check it out there.
So how’s your quarantine going guys? How are you taking care of your mental health? Any tips to share?
The things we love most
After spending so much time home recently, I came to realize that it’s very easy to establish our own little routines, and get comfort from the small things. One of the things I noticed the past few weeks is that I truly love the handmade pottery pieces I have, and that I keep using them all the time. I even see it on my instagram feed, as most food pictures I post on there also happen to feature some hand made items.
Seeing that, I thought I could present you guys the last pieces I finished in 2019, talk a little bit more about the process and show you the full collections I’ve been using constantly since then.
First off, I think the last time we talked pottery, I told you my favorite part of it was actually applying the glaze, because it was always kind of a surprise how things were really going to turn out. Here’s a very good example of what I mean by that. Left picture is just after applying the glaze, right is the same pieces once out of the kiln.


You can tell it’s the same pieces, but man do they look different! Sometimes you can try to imagine as much as you want, but it’ll turn into something you never expected, especially if it’s a glaze you’ve never used before. Now since I’ve been using the same colour combos for a while now I sort of know what to expect, but I still do get surprises every now and then nonetheless.
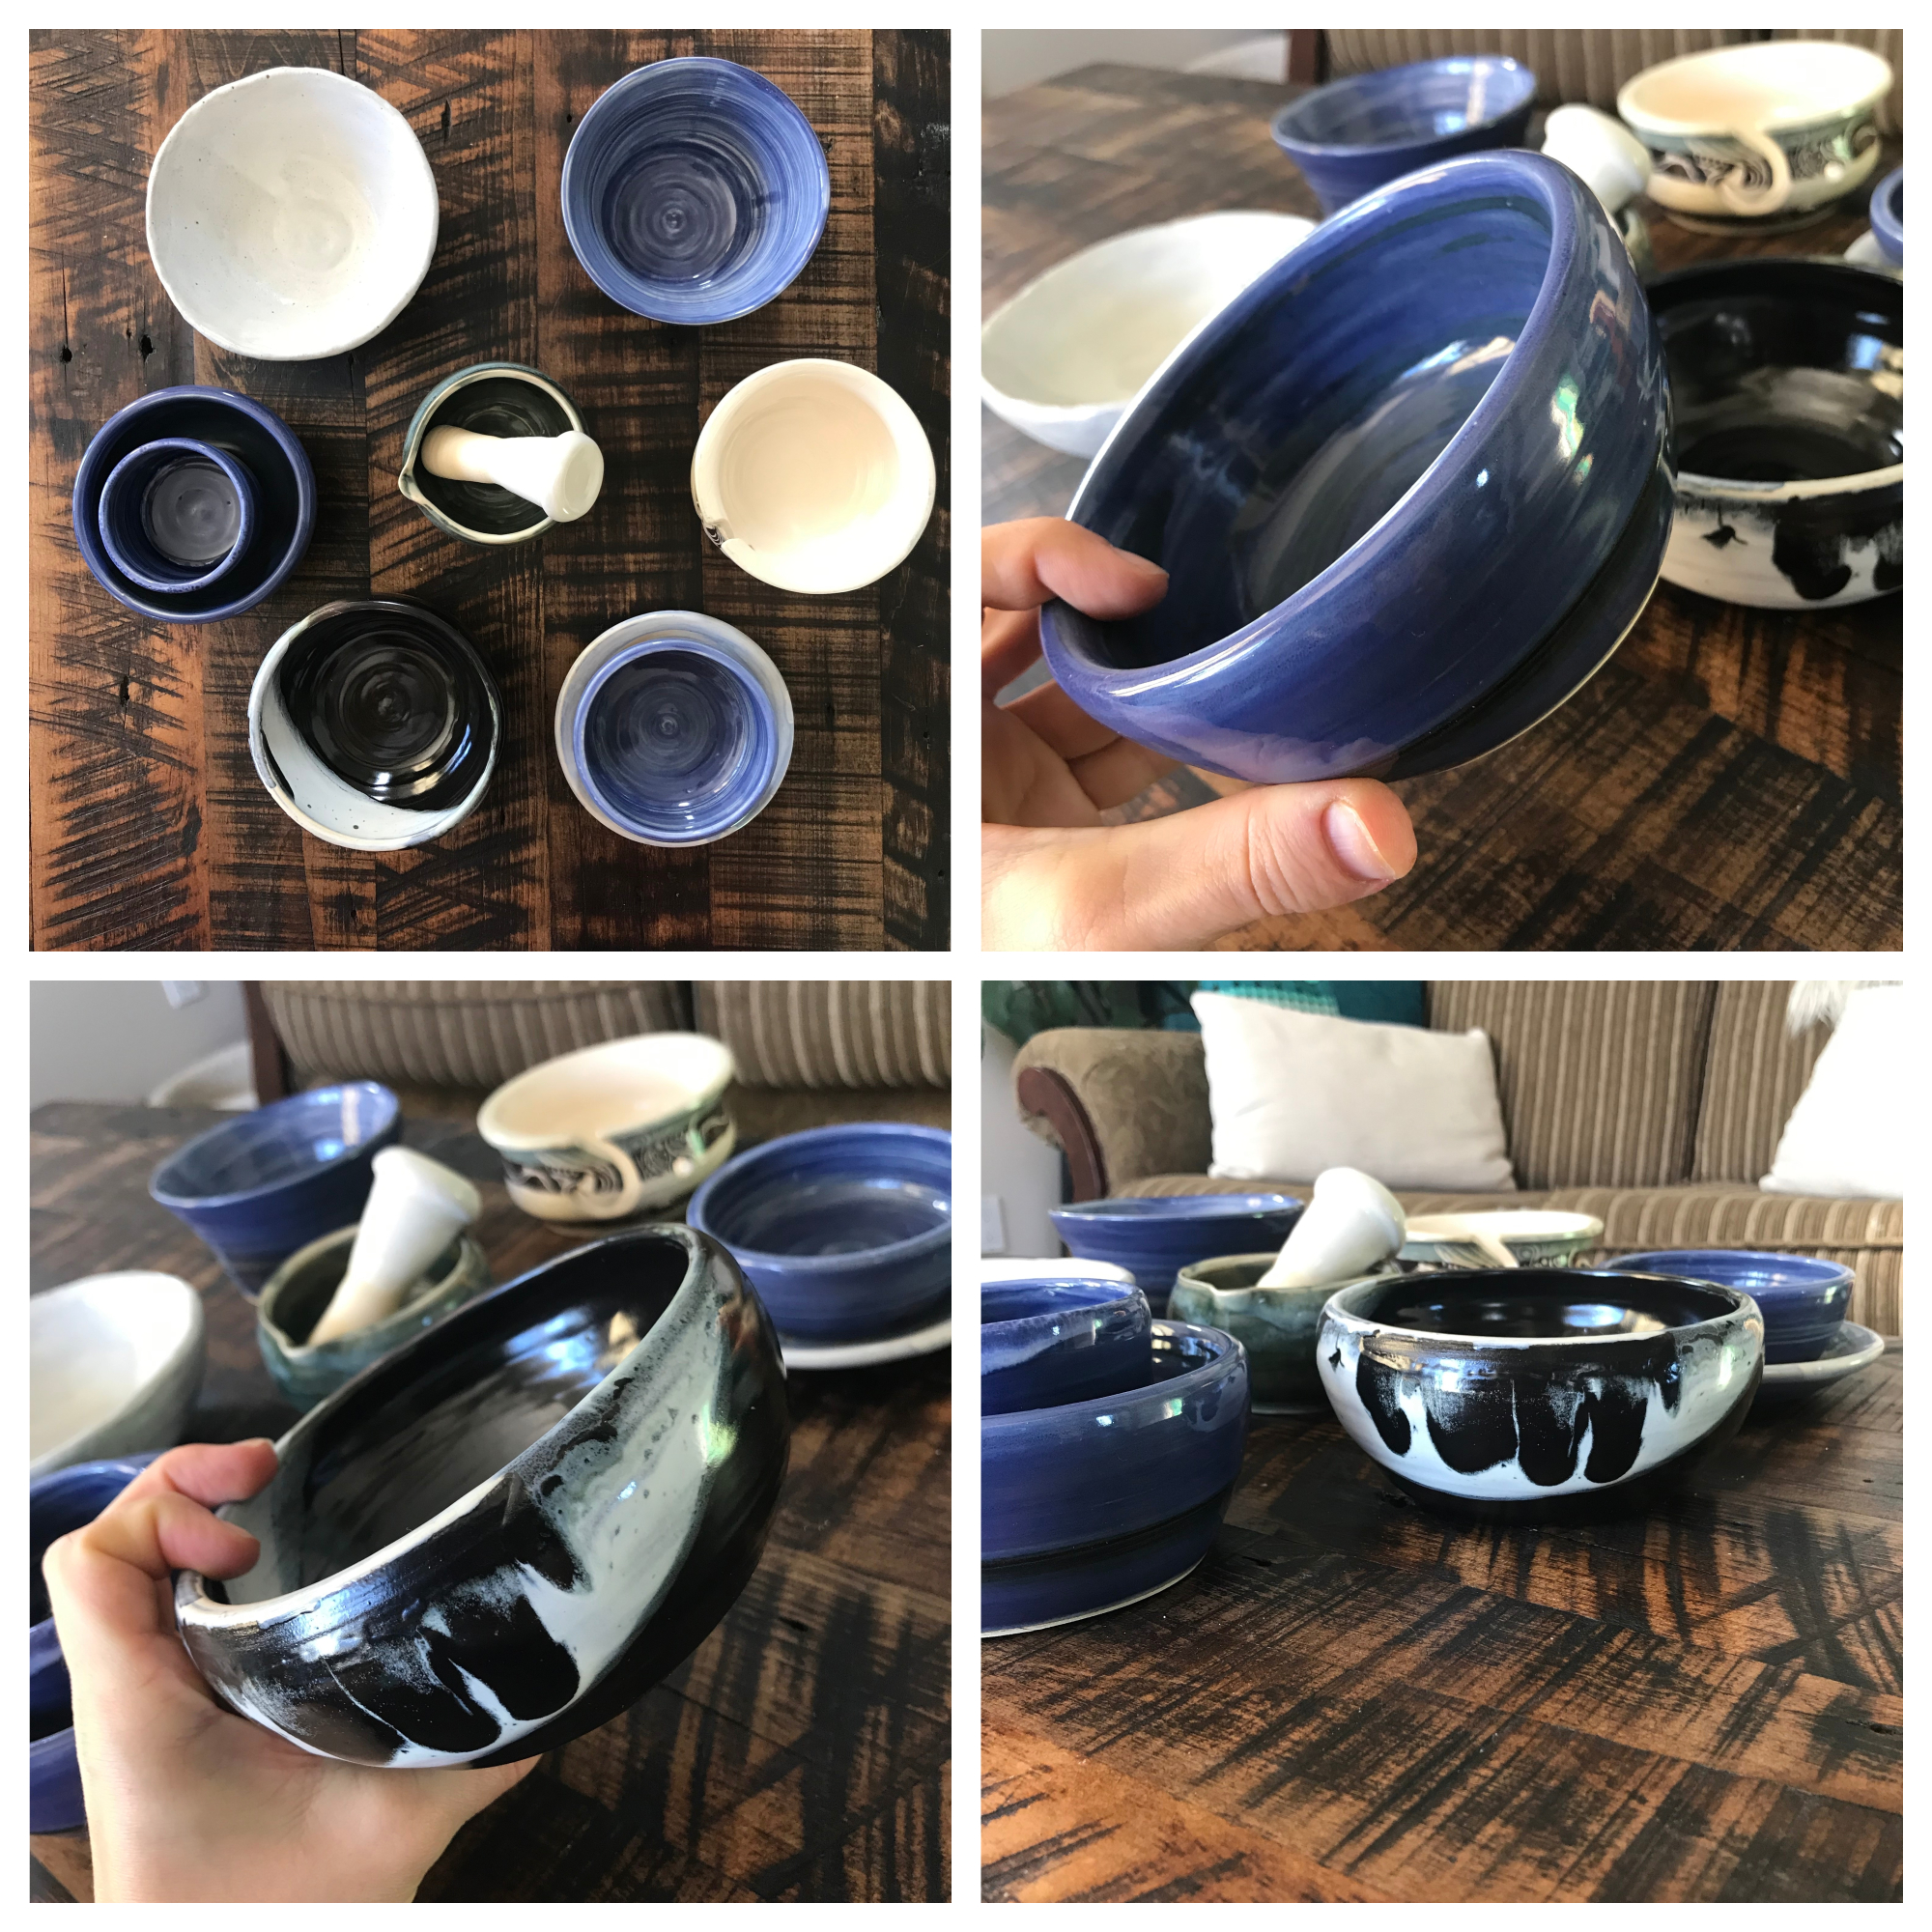
The two main “collections” if you will, that I’ve been working on are this classic black and white (my Moody set) and the wavy white and teal (my Ocean set).

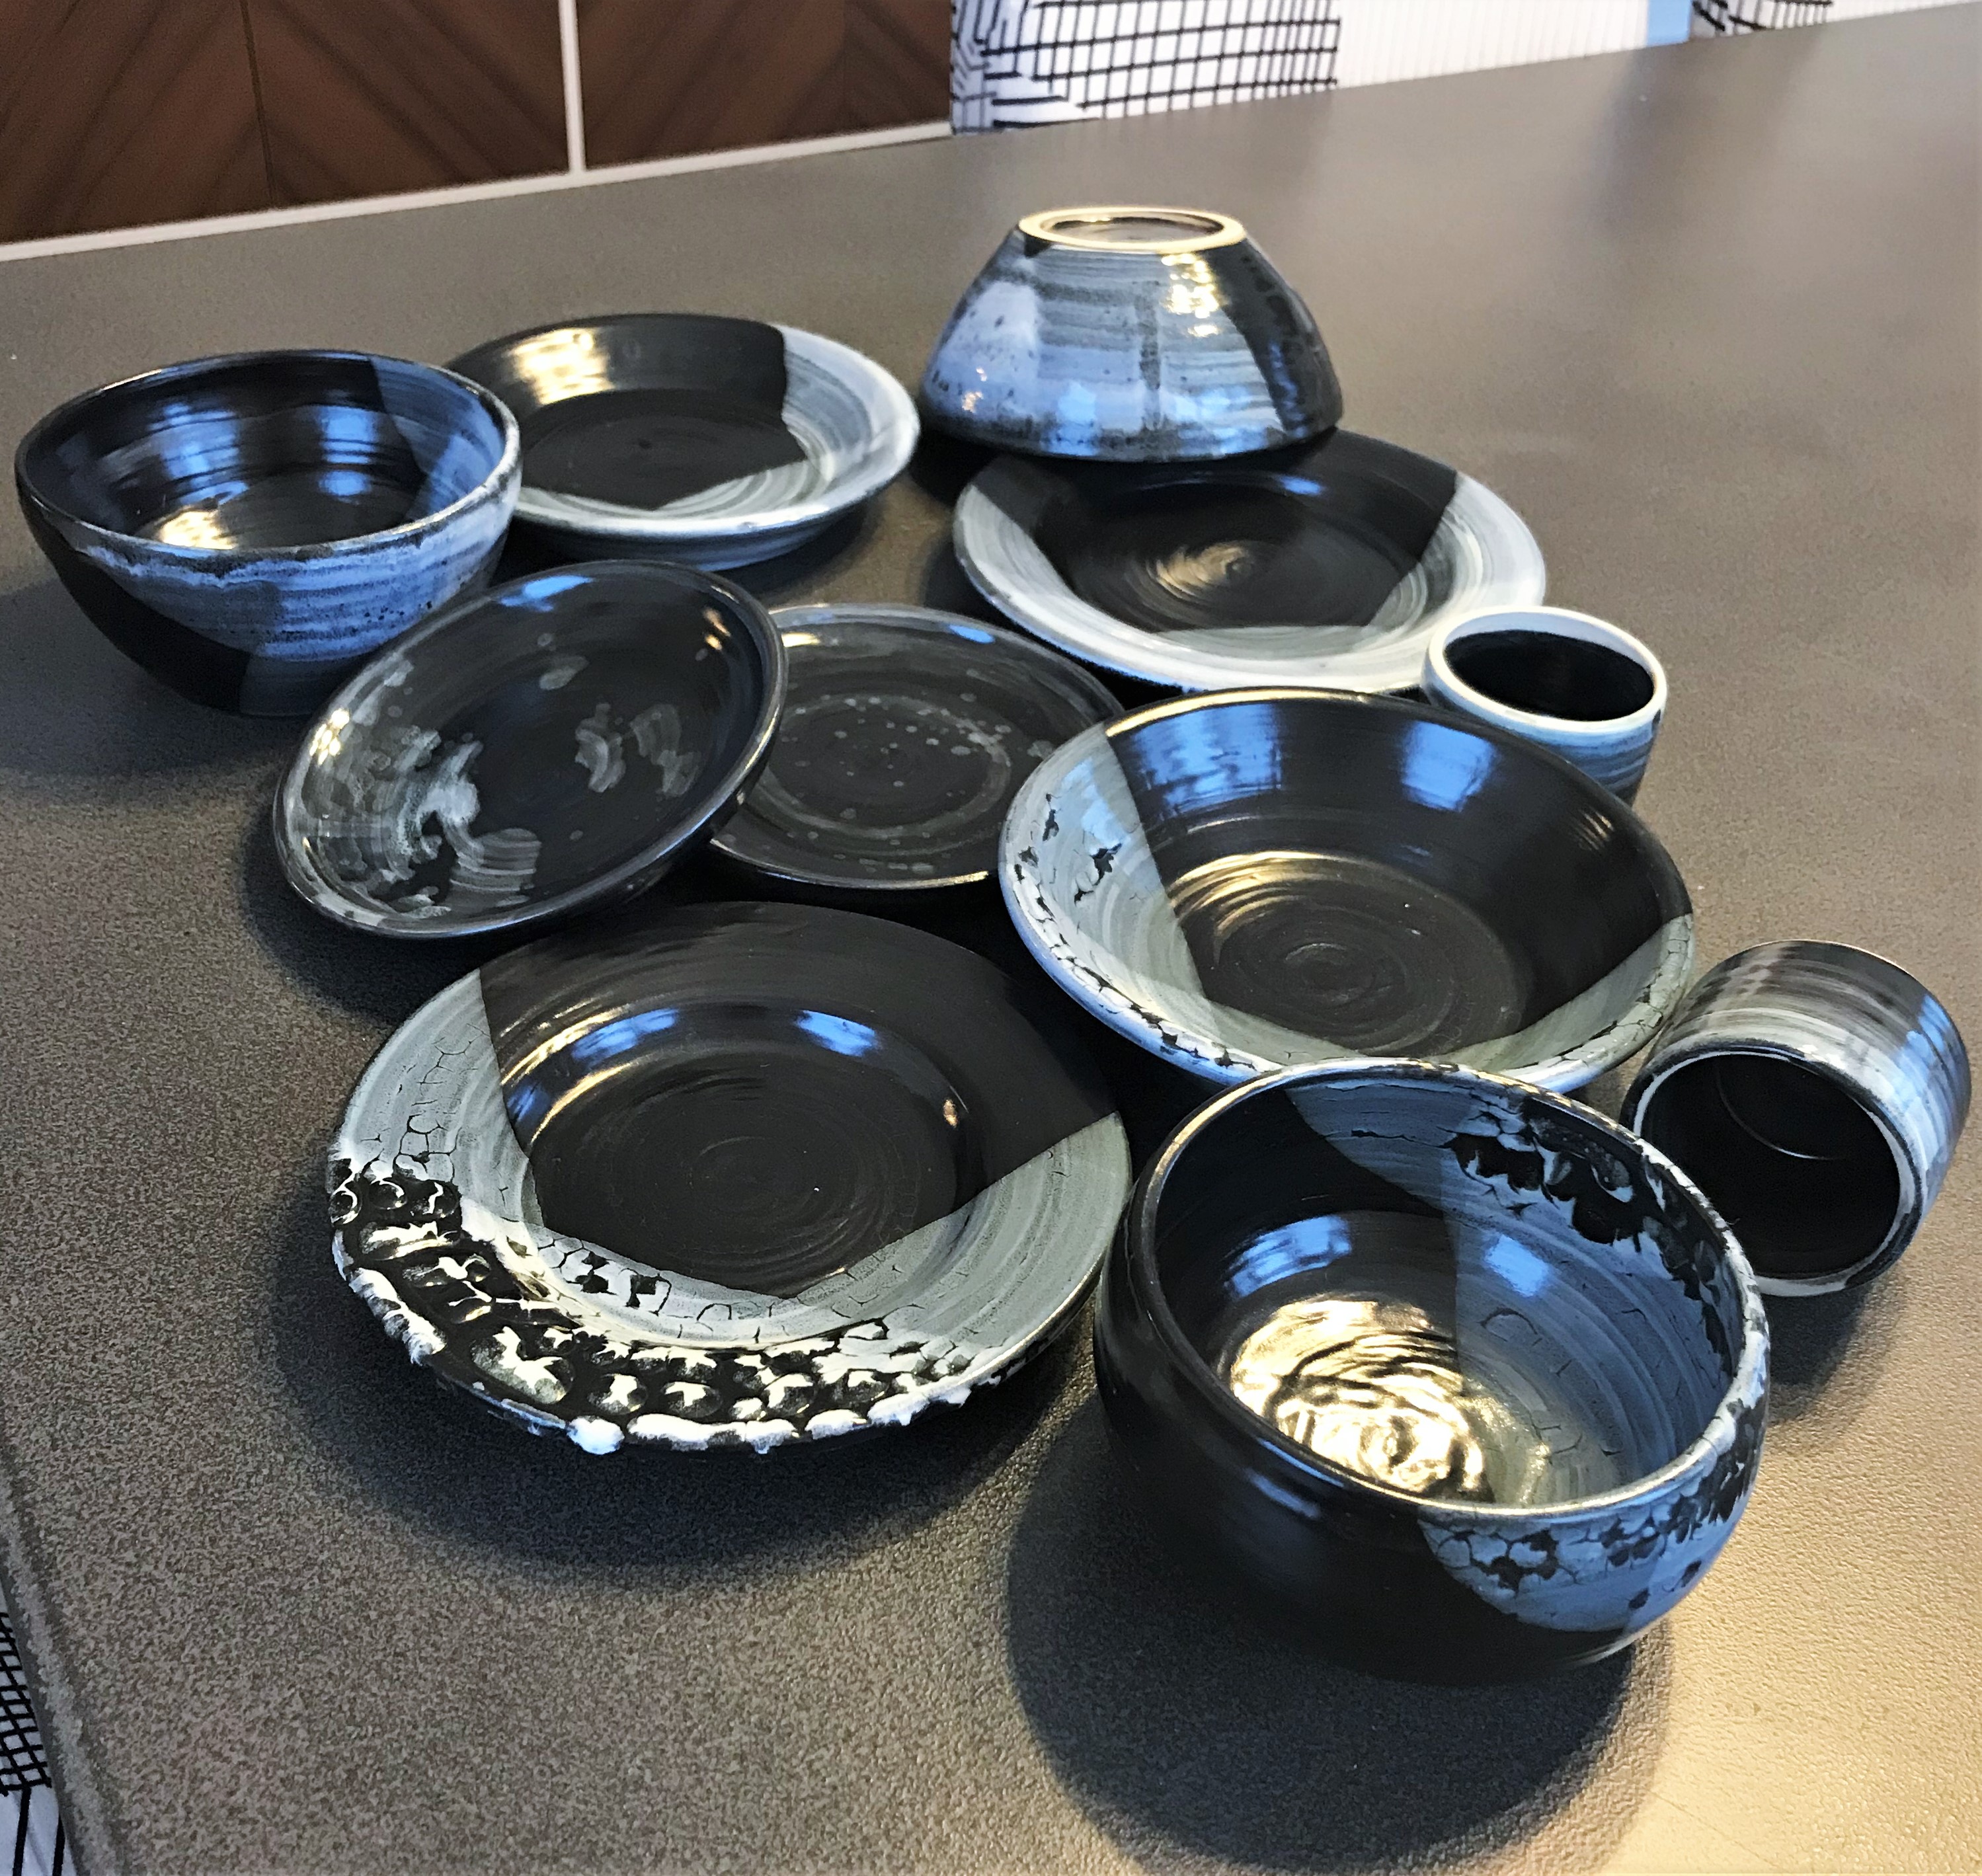
This black set basically starts with an even black base, then the pieces are dipped in white glaze on one side as an overlay. Except for the onces with the interesting texture, they’re pretty much all the same. The two small plates have specks on them, something I tried here (but didn’t quite like in this palette) but exploited a lot more in the second set I made, that I affectionately call my Ocean set.
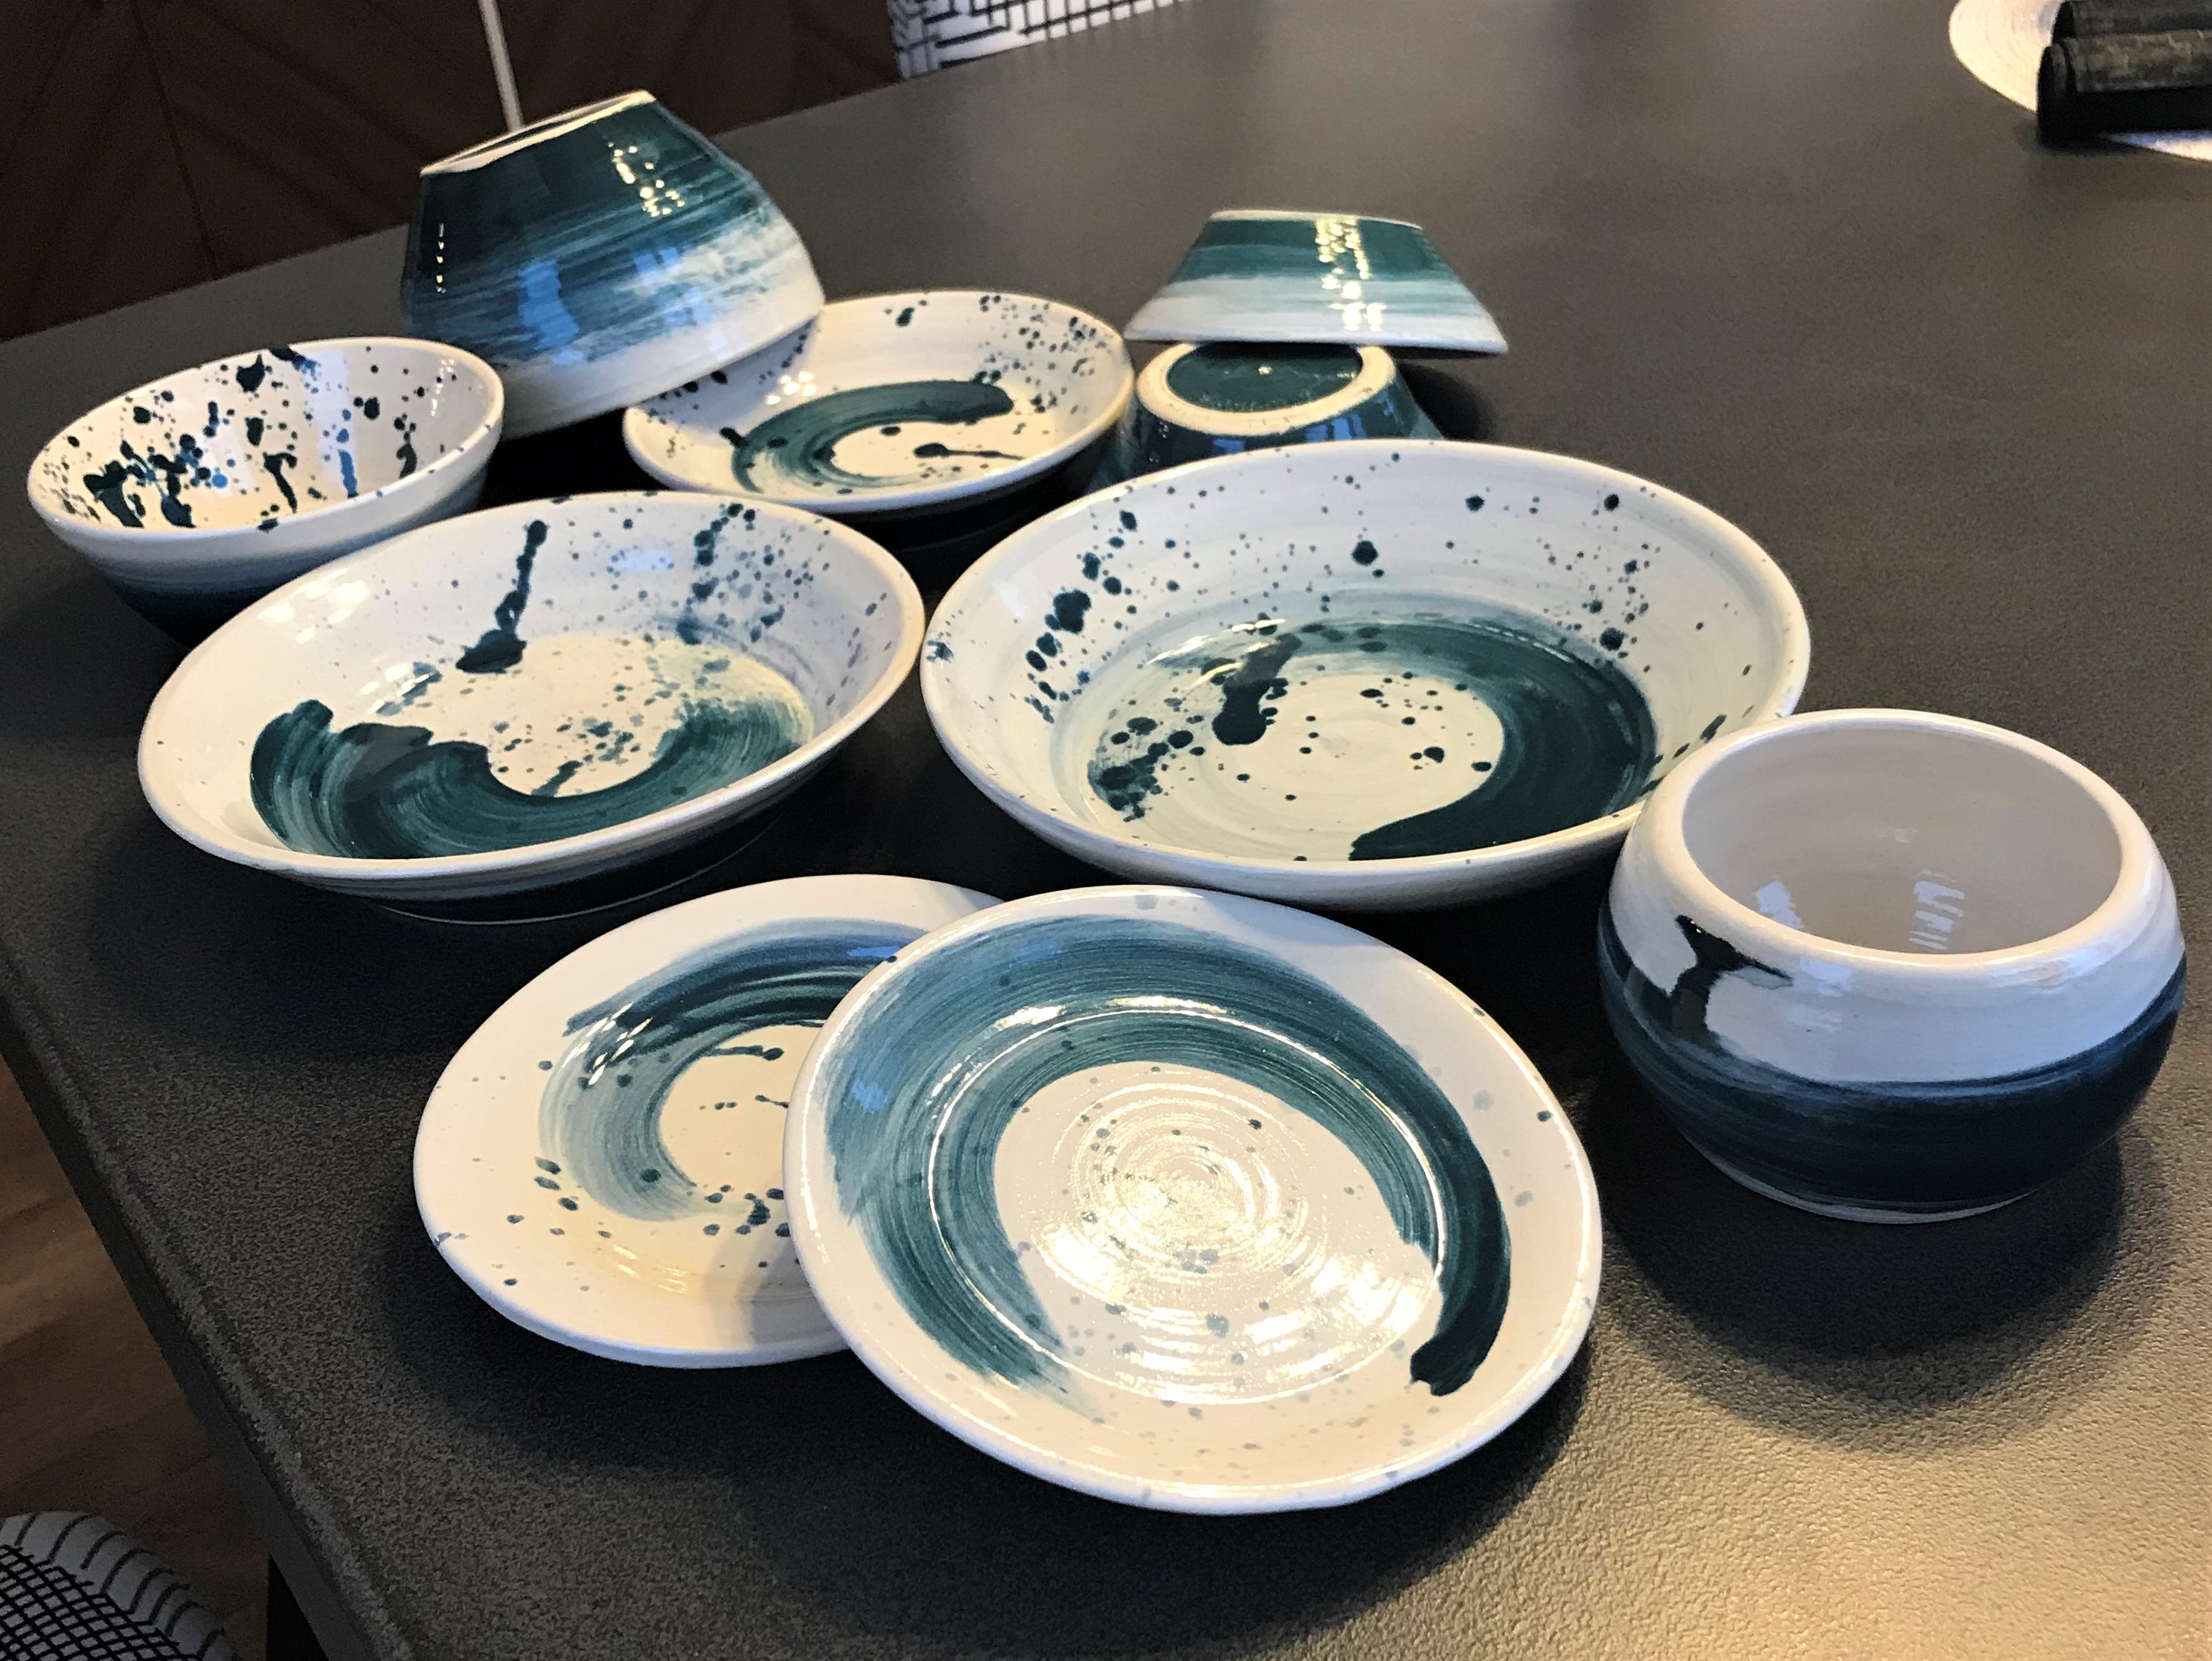
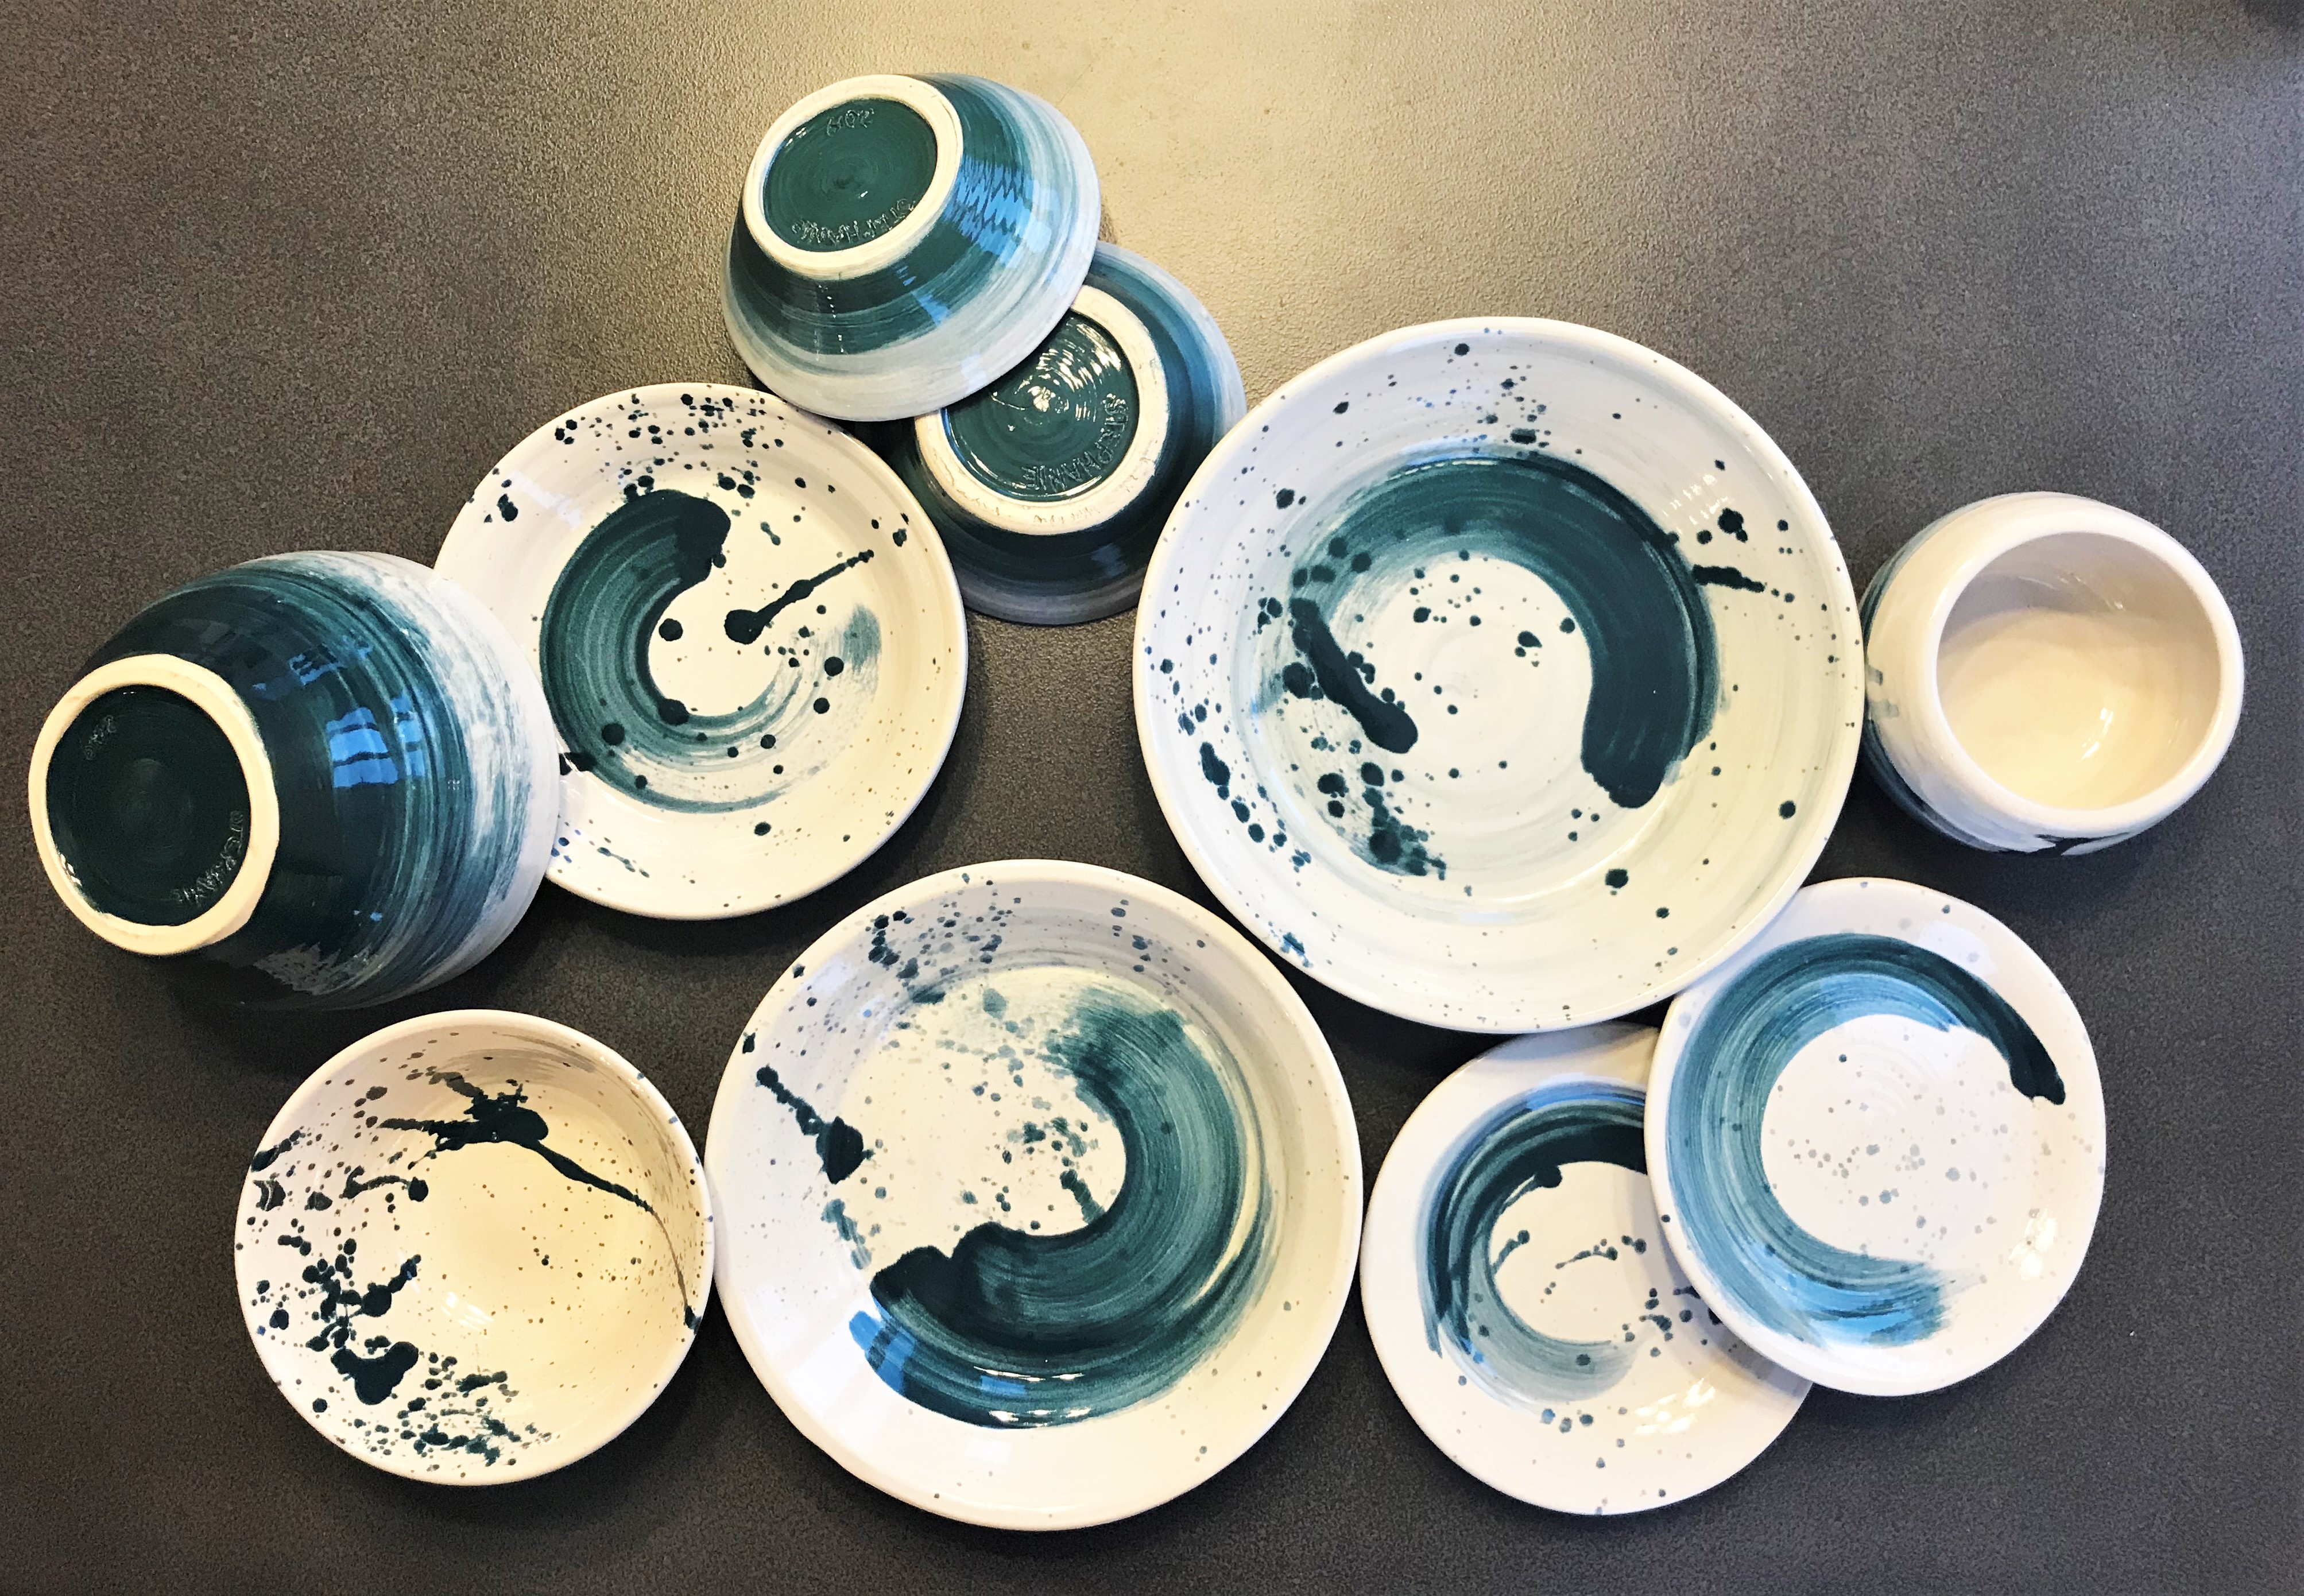
Half of those pieces (mostly the bowls) have a gradient-ish exterior and a plain white interior. The other ones (mostly the plates) have a basic white glaze with a bold teal brush stroke and a few specks here and there, reminiscent (to me) of the waves of the ocean.
I love those two sets so much I’ve just been using and washing and reusing them non stop since the holidays, and I really don’t think I will ever stop. They are very close to my heart, and although I do (and will probably continue to) experiment with other colours, just like the yellow ones in the first picture, I think I will definitely keep making pieces to add to these two collections as I go.
Talking about experiments, I tried something fun and different with these 3 pieces right there, as they were meant as a gift. There is some texture to them as I added some stripes on the side, then used a dark blue and green scheme with a lot of splashes of colour.


Overall I’m pretty happy with the result, and I hope the intended recipient will be too!
That’s it for today folks, new post knitting post coming soon 🙂
Cheers!
The Unfinishables
We all have some of those, right? Well, staying home a lot more recently has given me an opportunity to revisit those, and to put the final stitches on a couple projects I (really) should’ve finished long ago.
First off is this luscious green cardigan I’ve started in October 2017 as a test-knit for the lovely Anne, for her French Kiss cardigan pattern. Now I feel particularly terrible about this one because I’m the type who will not sign up for a test knit unless I know for sure I can finish before the deadline. As luck would have it though, many unexpected things happened during that time frame that prevented me from completing the test. I felt horrible and apologized profusely, but after the pattern was published I didn’t feel as much pressure to finish the project so I just left it there and forgot about it. I’m so happy (and relieved) it is finally done, and right on time too – the colour and the yarn are perfect for spring / summer.


I used about 6 and a half skeins of Nettle Grove yarn from Plymouth Yarn in the colour “Mermaid”. This yarn is an interesting cotton, linen, silk and nettle mix, and although I’m not a huge fan, I gotta say that the final washed fabric is actually pretty soft and has very good stitch definition. I pretty much followed pattern instructions exactly, all the details are on my Ravelry project page.
Second project I want to show you guys is my second iteration of the Dessine-Moi Un Mouton sweater by La Maison Rililie that I had started in December 2018. It’s no secret that I love this design, I’ve used it before to make my Spilled Wine sweater (and made quite a fuss about it), and I seem to always gravitate towards this design to showcase something special. First time was a gradient yarn set from Wonderland Yarns, and now this time it’s one of my very first handspun yarn, that I had attempted to use for a BlueSand Cardigan before but ended up frogging (the unsuccessful attempt is still documented here).


Just like the first time I made this sweater, I’m using a staple yarn for me, Cascade’s Heritage Solids yarn, but this time I went for charcoal grey. I also again worked on a modified gauge (since I’m using fingering weight yarn), though this time I made this sweater one size smaller, since I’ve lost a lot of weight since I made the first iteration of this sweater.
Overall, I am just SO happy at how this one turned out, and I really cannot wait to wear it!! It’s fun, it’s playful, it’s comfy and more than anything, it’s not on a needle anymore. As usual the details on yardage and mods are available on my project page so feel free to check it out 🙂
Cheers!
Wheeling away
Fall is slowly settling in here in the Great White North, the temperatures have been dropping (though this week has been kind of warm) and the leaves have turned deep and saturated shades of purple, red and orange everywhere you look. It’s great and bright and crisp and sweater weather is just around the corner; needless to say that I’m in a good mood.
And as I am just starting my third pottery session at the studio Terramiel, I wanted to show you guys what I’ve been working on on that front. Throughout the past year, I’ve come to develop a deep love for pottery, and although I’m nowhere near good enough just yet, I’m slowly but surely making progress.


I like applying the glaze because it’s always a little bit unclear/uncertain what the final result will look like. This element of surprise is something that I am quite fond of, and that’s probably why it’s also my favorite part of the process.
As you may have noticed, some of the black and white pieces have a bit of a different texture than what you would expect from a dipped piece, and that very well captures the uncertainty I’m talking about.
Those pieces were glazed the exact same way I glazed my other black and white pieces, but the firing process went a bit differently. They were put in the kiln by my pottery teacher, but she set it at the wrong temperature. She noticed about 6 hours in and stopped it, then restarted it at the right temperature, but the change made the glaze react a bit differently and it created clumps and bumps here and there on the surface where the pieces were dipped and the glaze was thicker. Though those pieces ended up looking nothing like what I expected, I think it’s such a happy accident because I love how they look and feel.
I am working on some more pieces, and will have more to share in the next couple months, but that’s it for now – and that’s fine, because it’ll give me time to rearrange my (overflowing) cabinets to make more room for the new pieces to come.
Cheers!
Cushion and chair cover galore
Hey guys! Recently I’ve been a bit tied up with the house, with multiple projects going on and many ideas brewing so this week I have a few more home dec projects to share! Now I hadn’t made cushions covers in such a long time, probably years in fact, so I felt like it was time to finally make some new ones – especially now that I have a beautiful wooden bench around my dining room table to dress up.
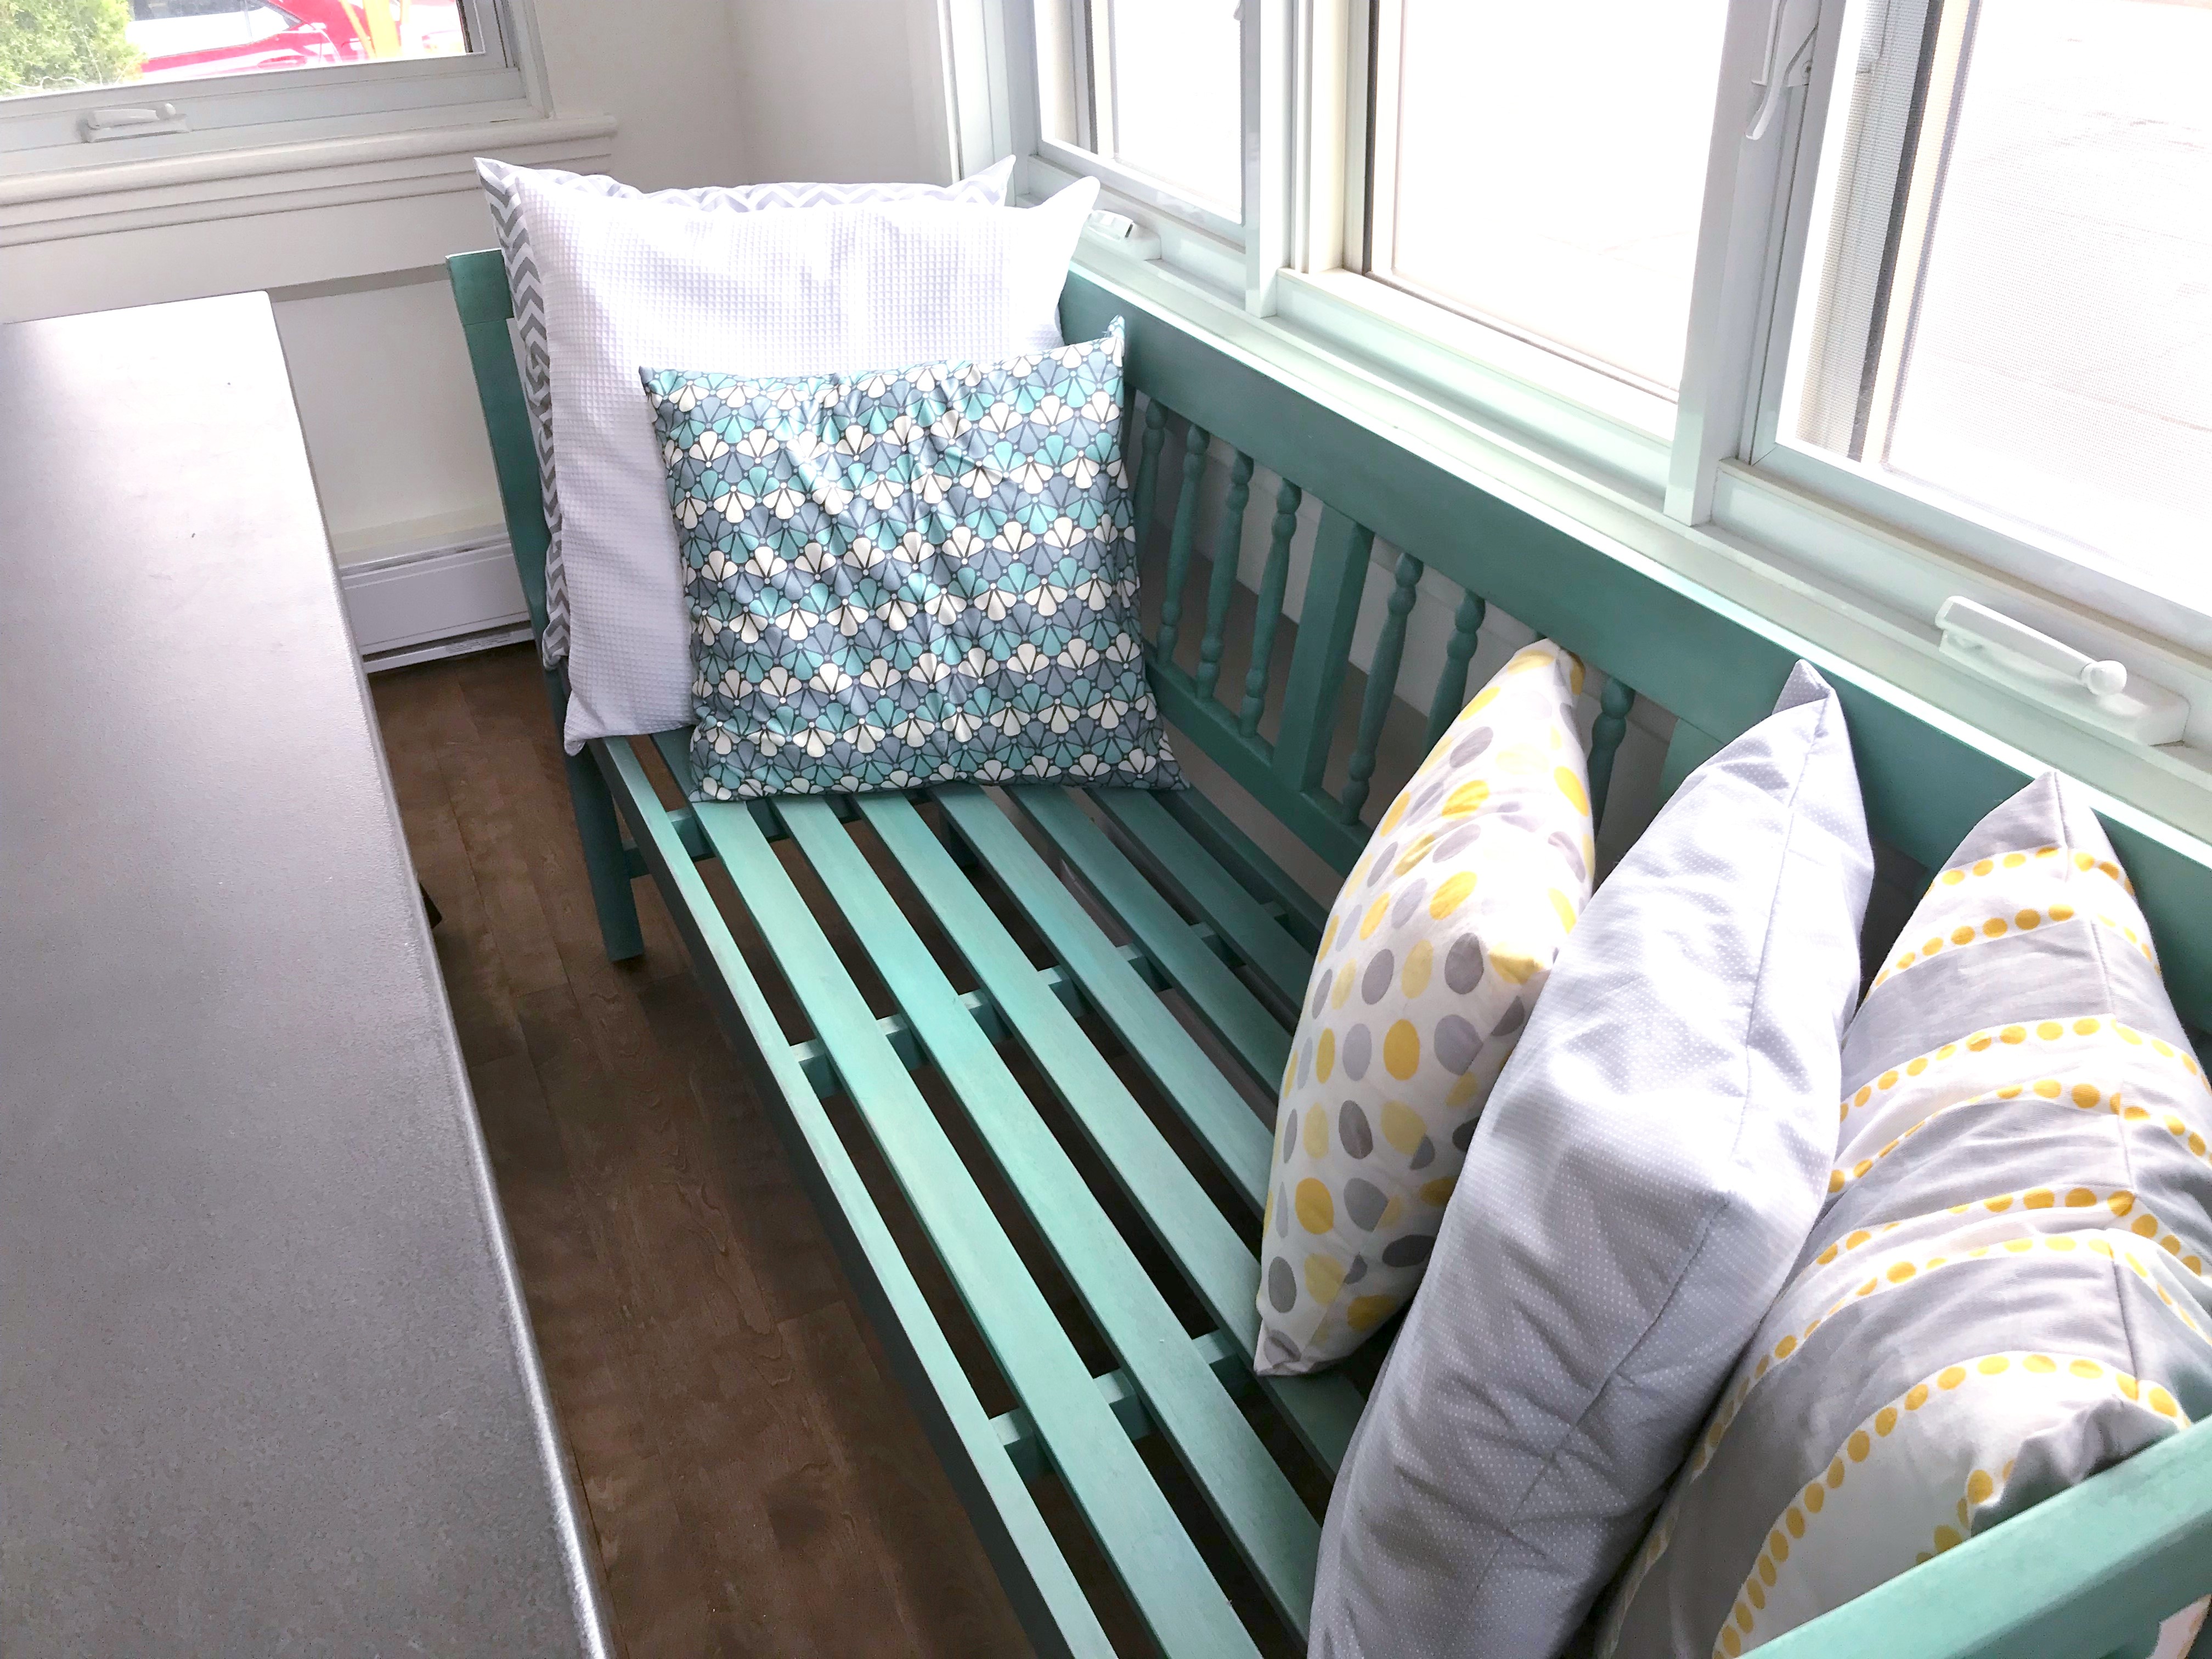
And while I was at it, why not make a couple more to replace the old ones in the living room, move the furniture around, sew a new chair cover, paint & reupholster my old bench and paint the backsplash in the kitchen (because it’s the same paint, you know…)? Ok, I admit it – I might have gone a tad bit overboard with the house stuff. But it looks absolutely gorgeous so I have absolutely no regrets! And with the new furniture now in, my dining room finally looks complete. Yes!!


Is it just me or if it feels like recently my blog has been turning into a design show? Next post, I promise, it will be all knitting and fiber and things!
Until then, cheers 🙂
New craft!
Hey guys! Last fall, I decided I needed something new in my live and decided to try my hand at a different craft. I didn’t really think about it too much, an opportunity just sort of opened up and I took it, and MANNN am I happy I did?
What’s this craft, you say? Well… I decided to take up pottery, and I’m in love!
I’ve done all kinds of stuff back when I was in college studying visual arts, I tried painting, sculpting, digital art, etc. but I never had a chance to try pottery. So when I heard there was a spot open at a nearby pottery studio, I jumped on the occasion and have been going there every Tuesday night since.
Now, I’m definitely very new to this and I’m not very good at it yet so there is most certainly room for improvement, but I very much enjoy it! I still struggle to make pieces that are straight and even, and sometimes even struggle trying to get them centered on the wheel, but I’m learning and having fun every time.
All but one of the pieces you can see on this picture were made with the help and coaching of Annik, from the studio Terramiel. She has been nothing but patient with me, she is very nice and welcoming and the other girls in class are all super fun and chatty.
Given my limited abilities, most of what I’ve been making so far is bowls of various shapes and sizes, a couple plates, few little tea cups and small yarn bowl. Although pretty small, the yarn bowl is actually the perfect size for small 50g balls of yarn so it’s quite perfect for socks or delicate lace projects 🙂

There’s one piece though that differs from the rest, and that would be this white bowl :

This bowl was shaped with the coiling technique rather than on a pottery wheel like the others, and the reason for that is that this one was actually made in Japan, at a little pottery studio called Ginza Craft Yeeyo, where I followed an introduction class to pottery with the lovely Maiko. I made this piece while I was in Japan around Halloween. I found the class on AirBnb “experiences”, and I found it very fun and interesting!
First, we were served delicious tea and traditional Japanese sweets, all the teacher passed around sheets of instructions that were written down in English with pictures. There was an interpreter present there to translate the teachers’s explanations regarding the process so that we could understand. We had to choose between 3 different types of clay, a light beige one, a red one (traditional in Japan) and a black one (that is a bit drier and harder to work with. I decided to go for traditional red clay with a white glaze on top.
Now if you’ve ever done pottery at all, you could probably guess that we did not apply the glaze ourselves during class, as the pieces were obviously not dry. After the class, the teacher fired the pieces and got them glazed following our wishes (we had to draw a little picture of what we wanted and indicate the color), then got them shipped to each student. I got mine in January, and I’ve been using it ever since 🙂
What about you guys, what have you been up to?
- ← Previous
- 1
- 2
- 3
- 4
- Next →
