stripes
Peach Fuzz trio
Life is busy folks! But even though I haven’t been posting here, I promise I’ve been crafting on. And I was so proud of my last few makes that I wanted to pop in here to show you what it is 🙂
A few months ago, I ordered Melanie Berg’s most recent book “Sweaters”, and I love just about every design in there (as expected! She’s such a brilliant pattern designer).
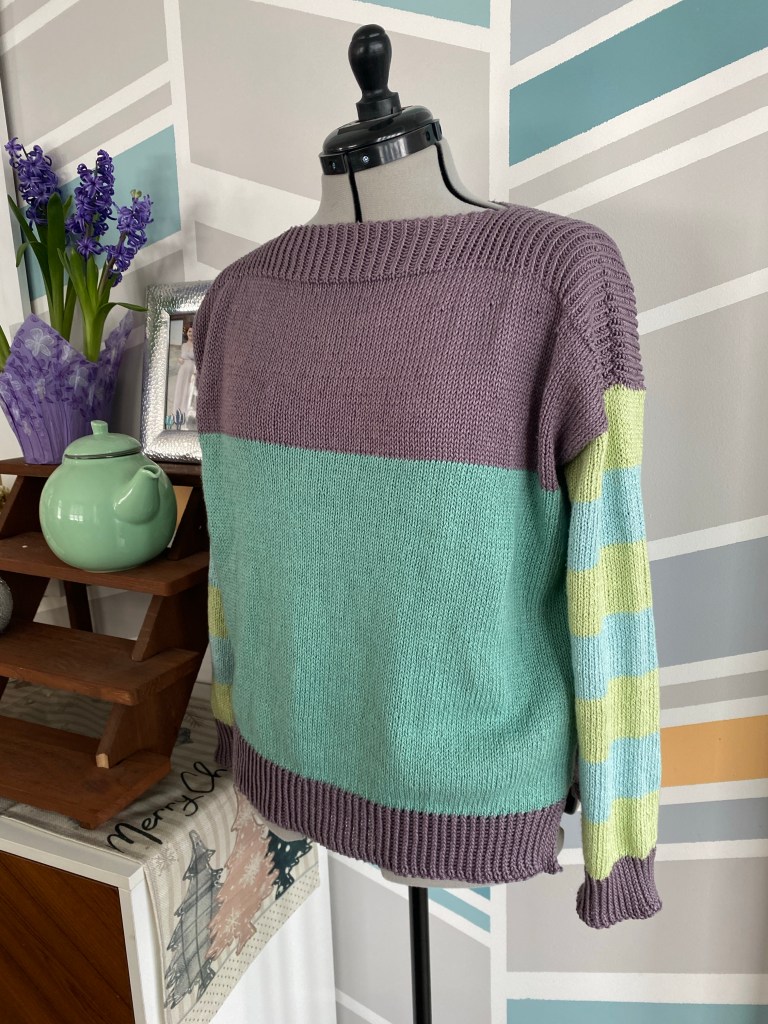
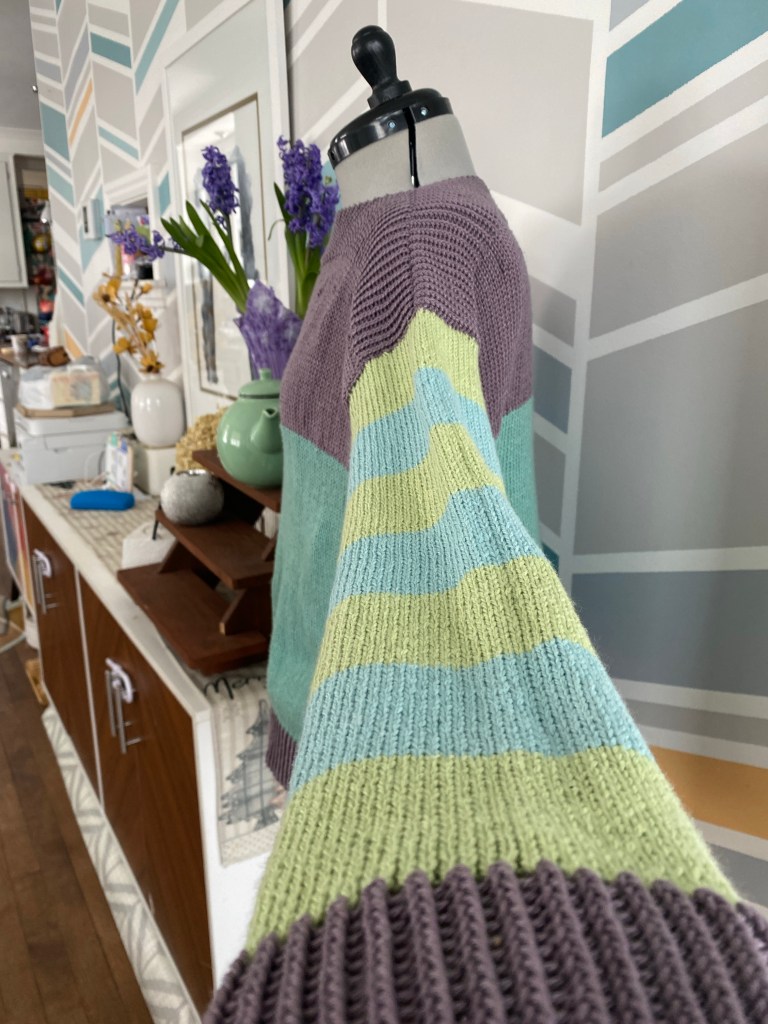
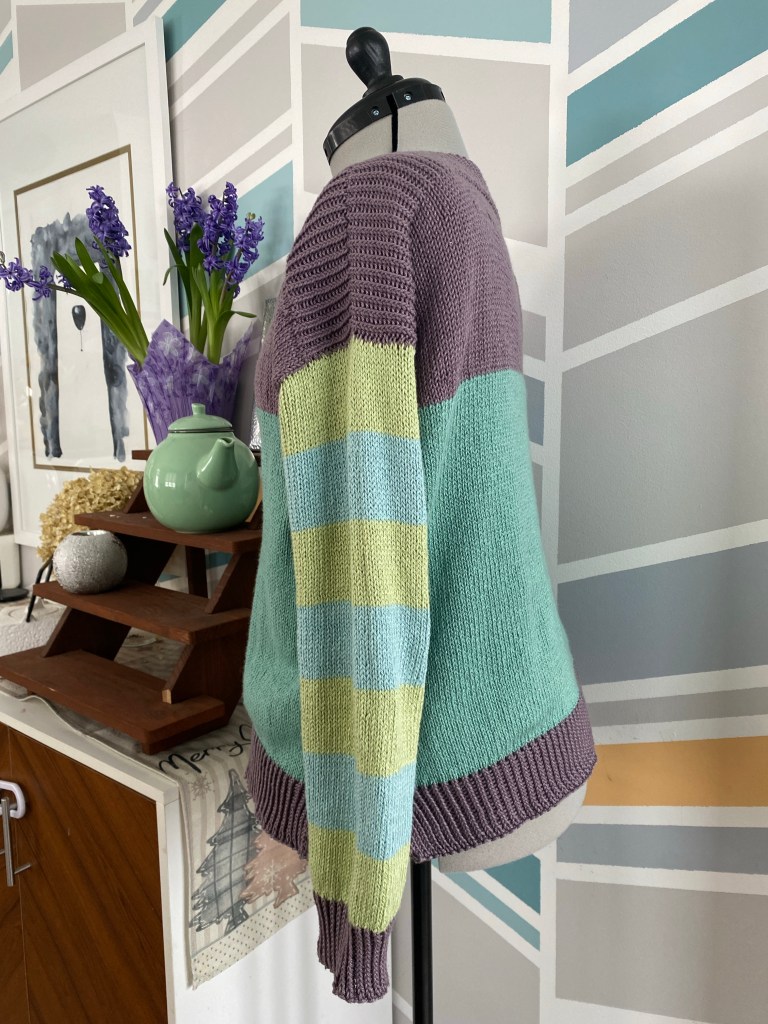
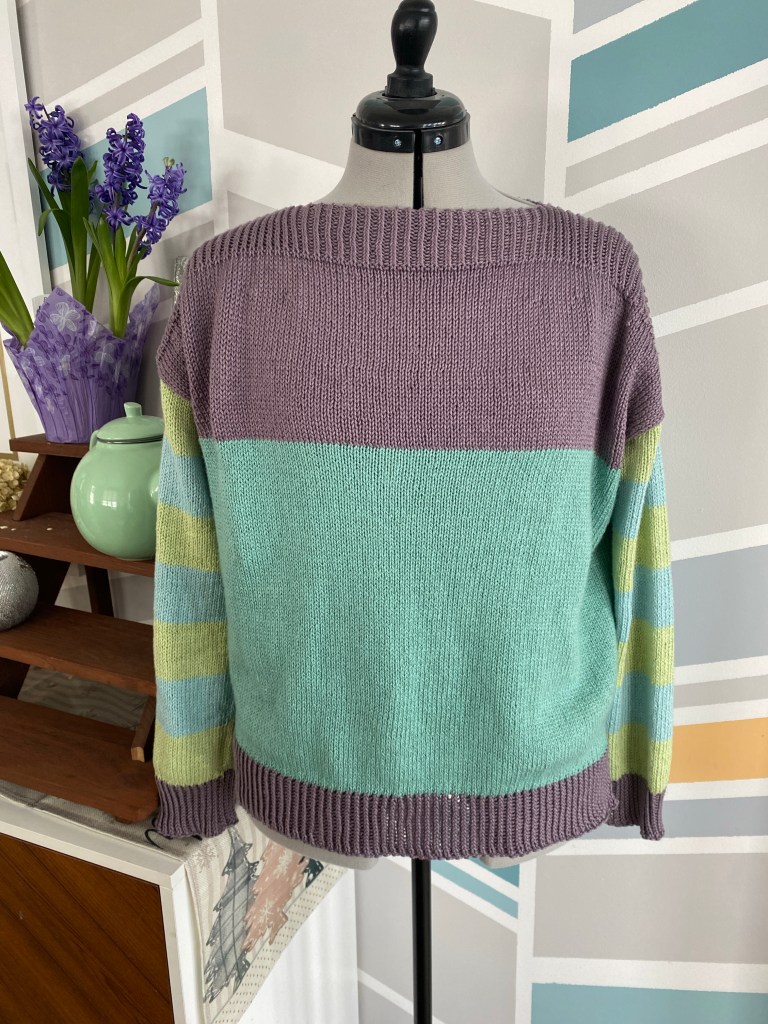
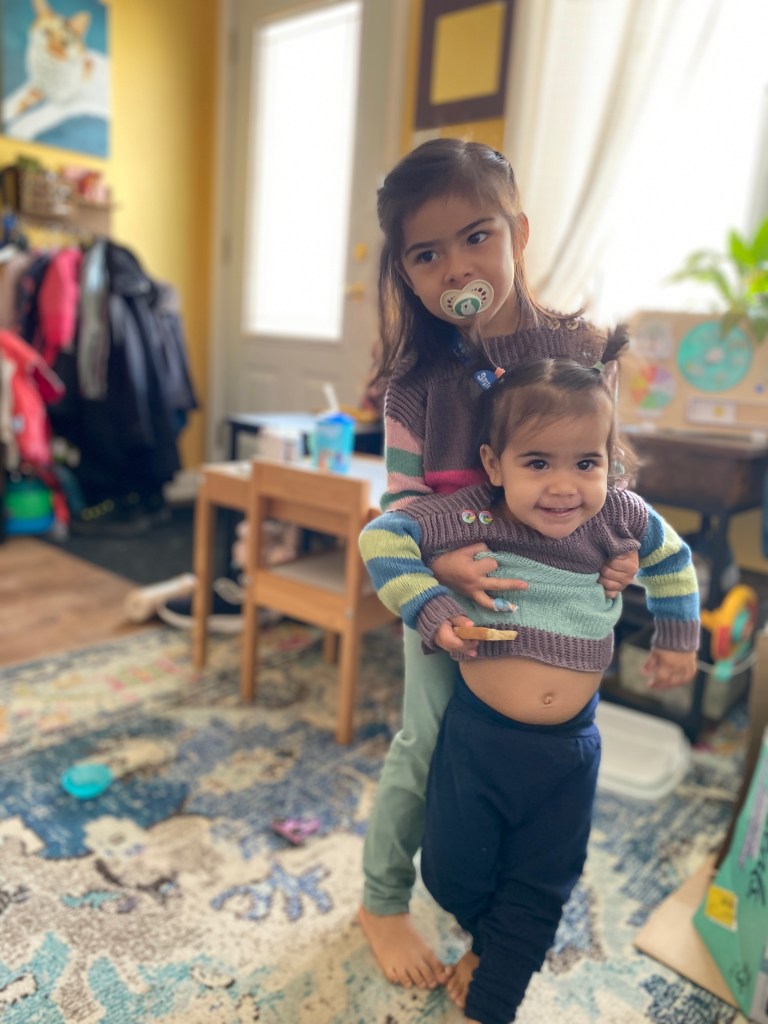
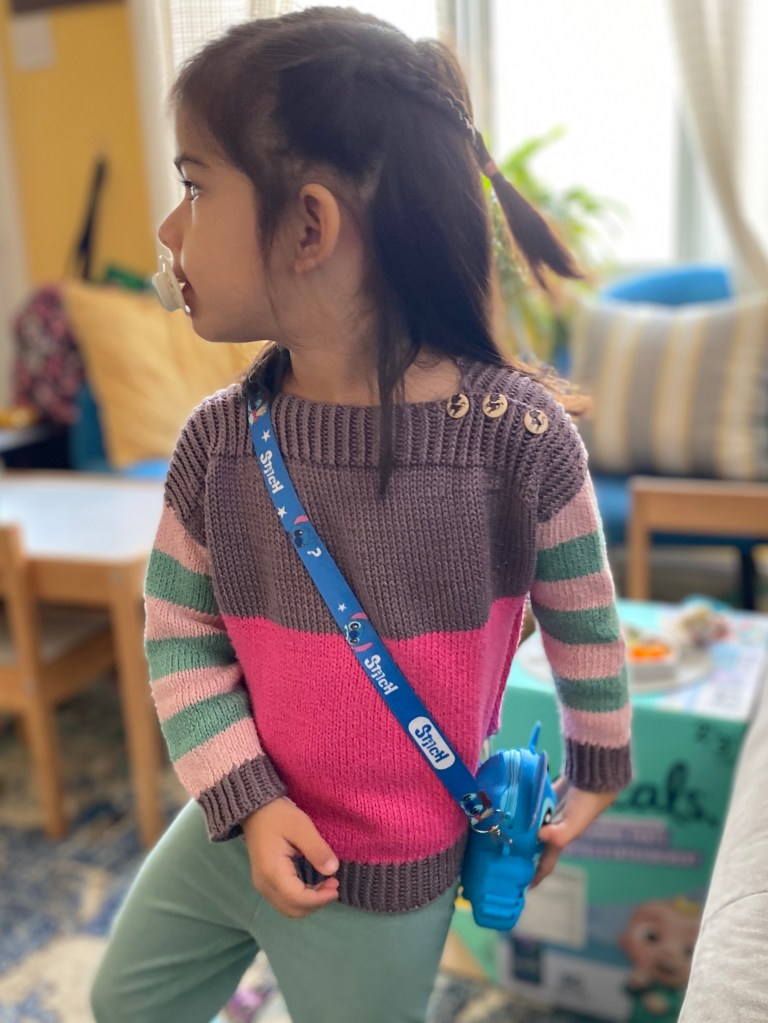
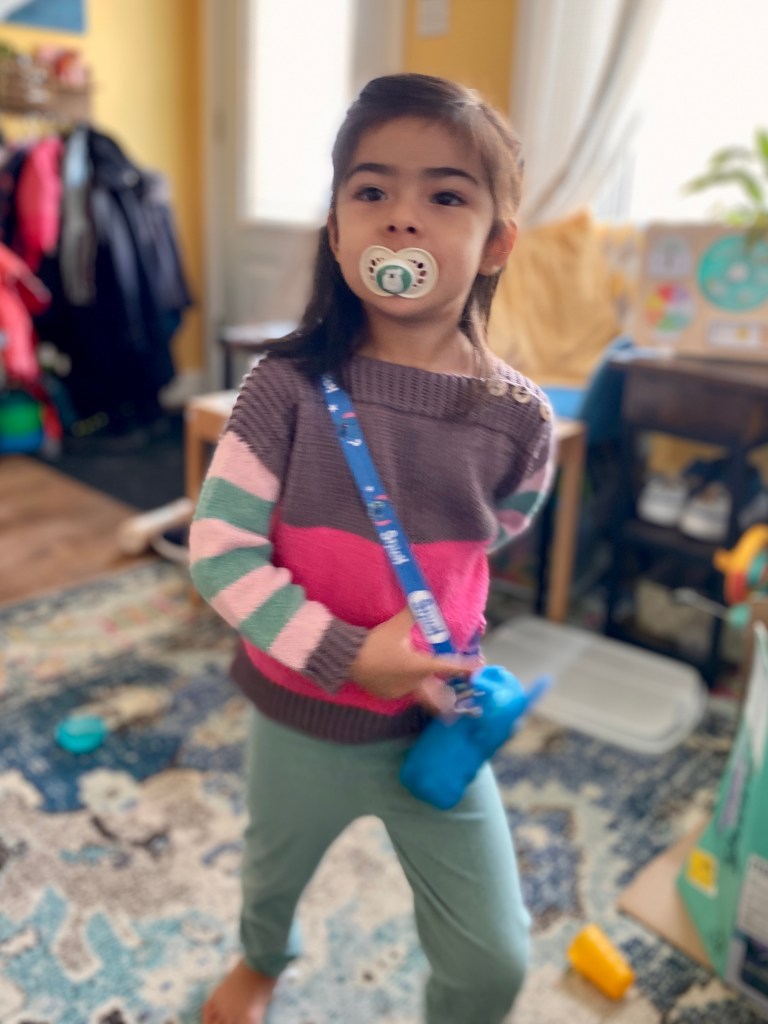
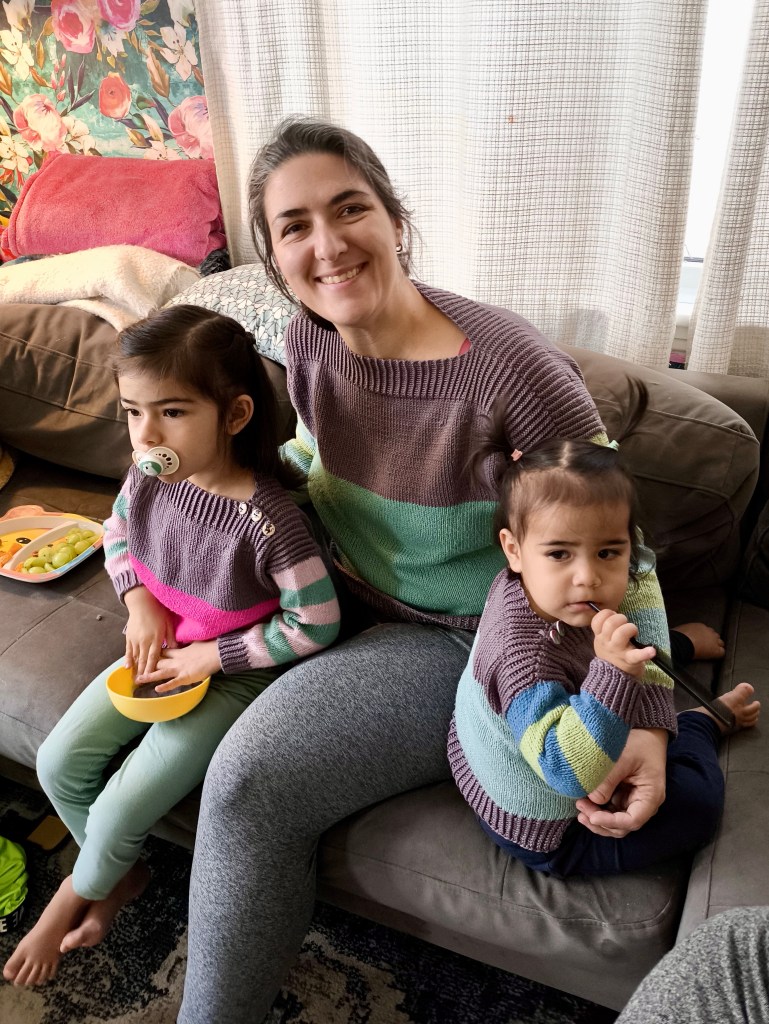
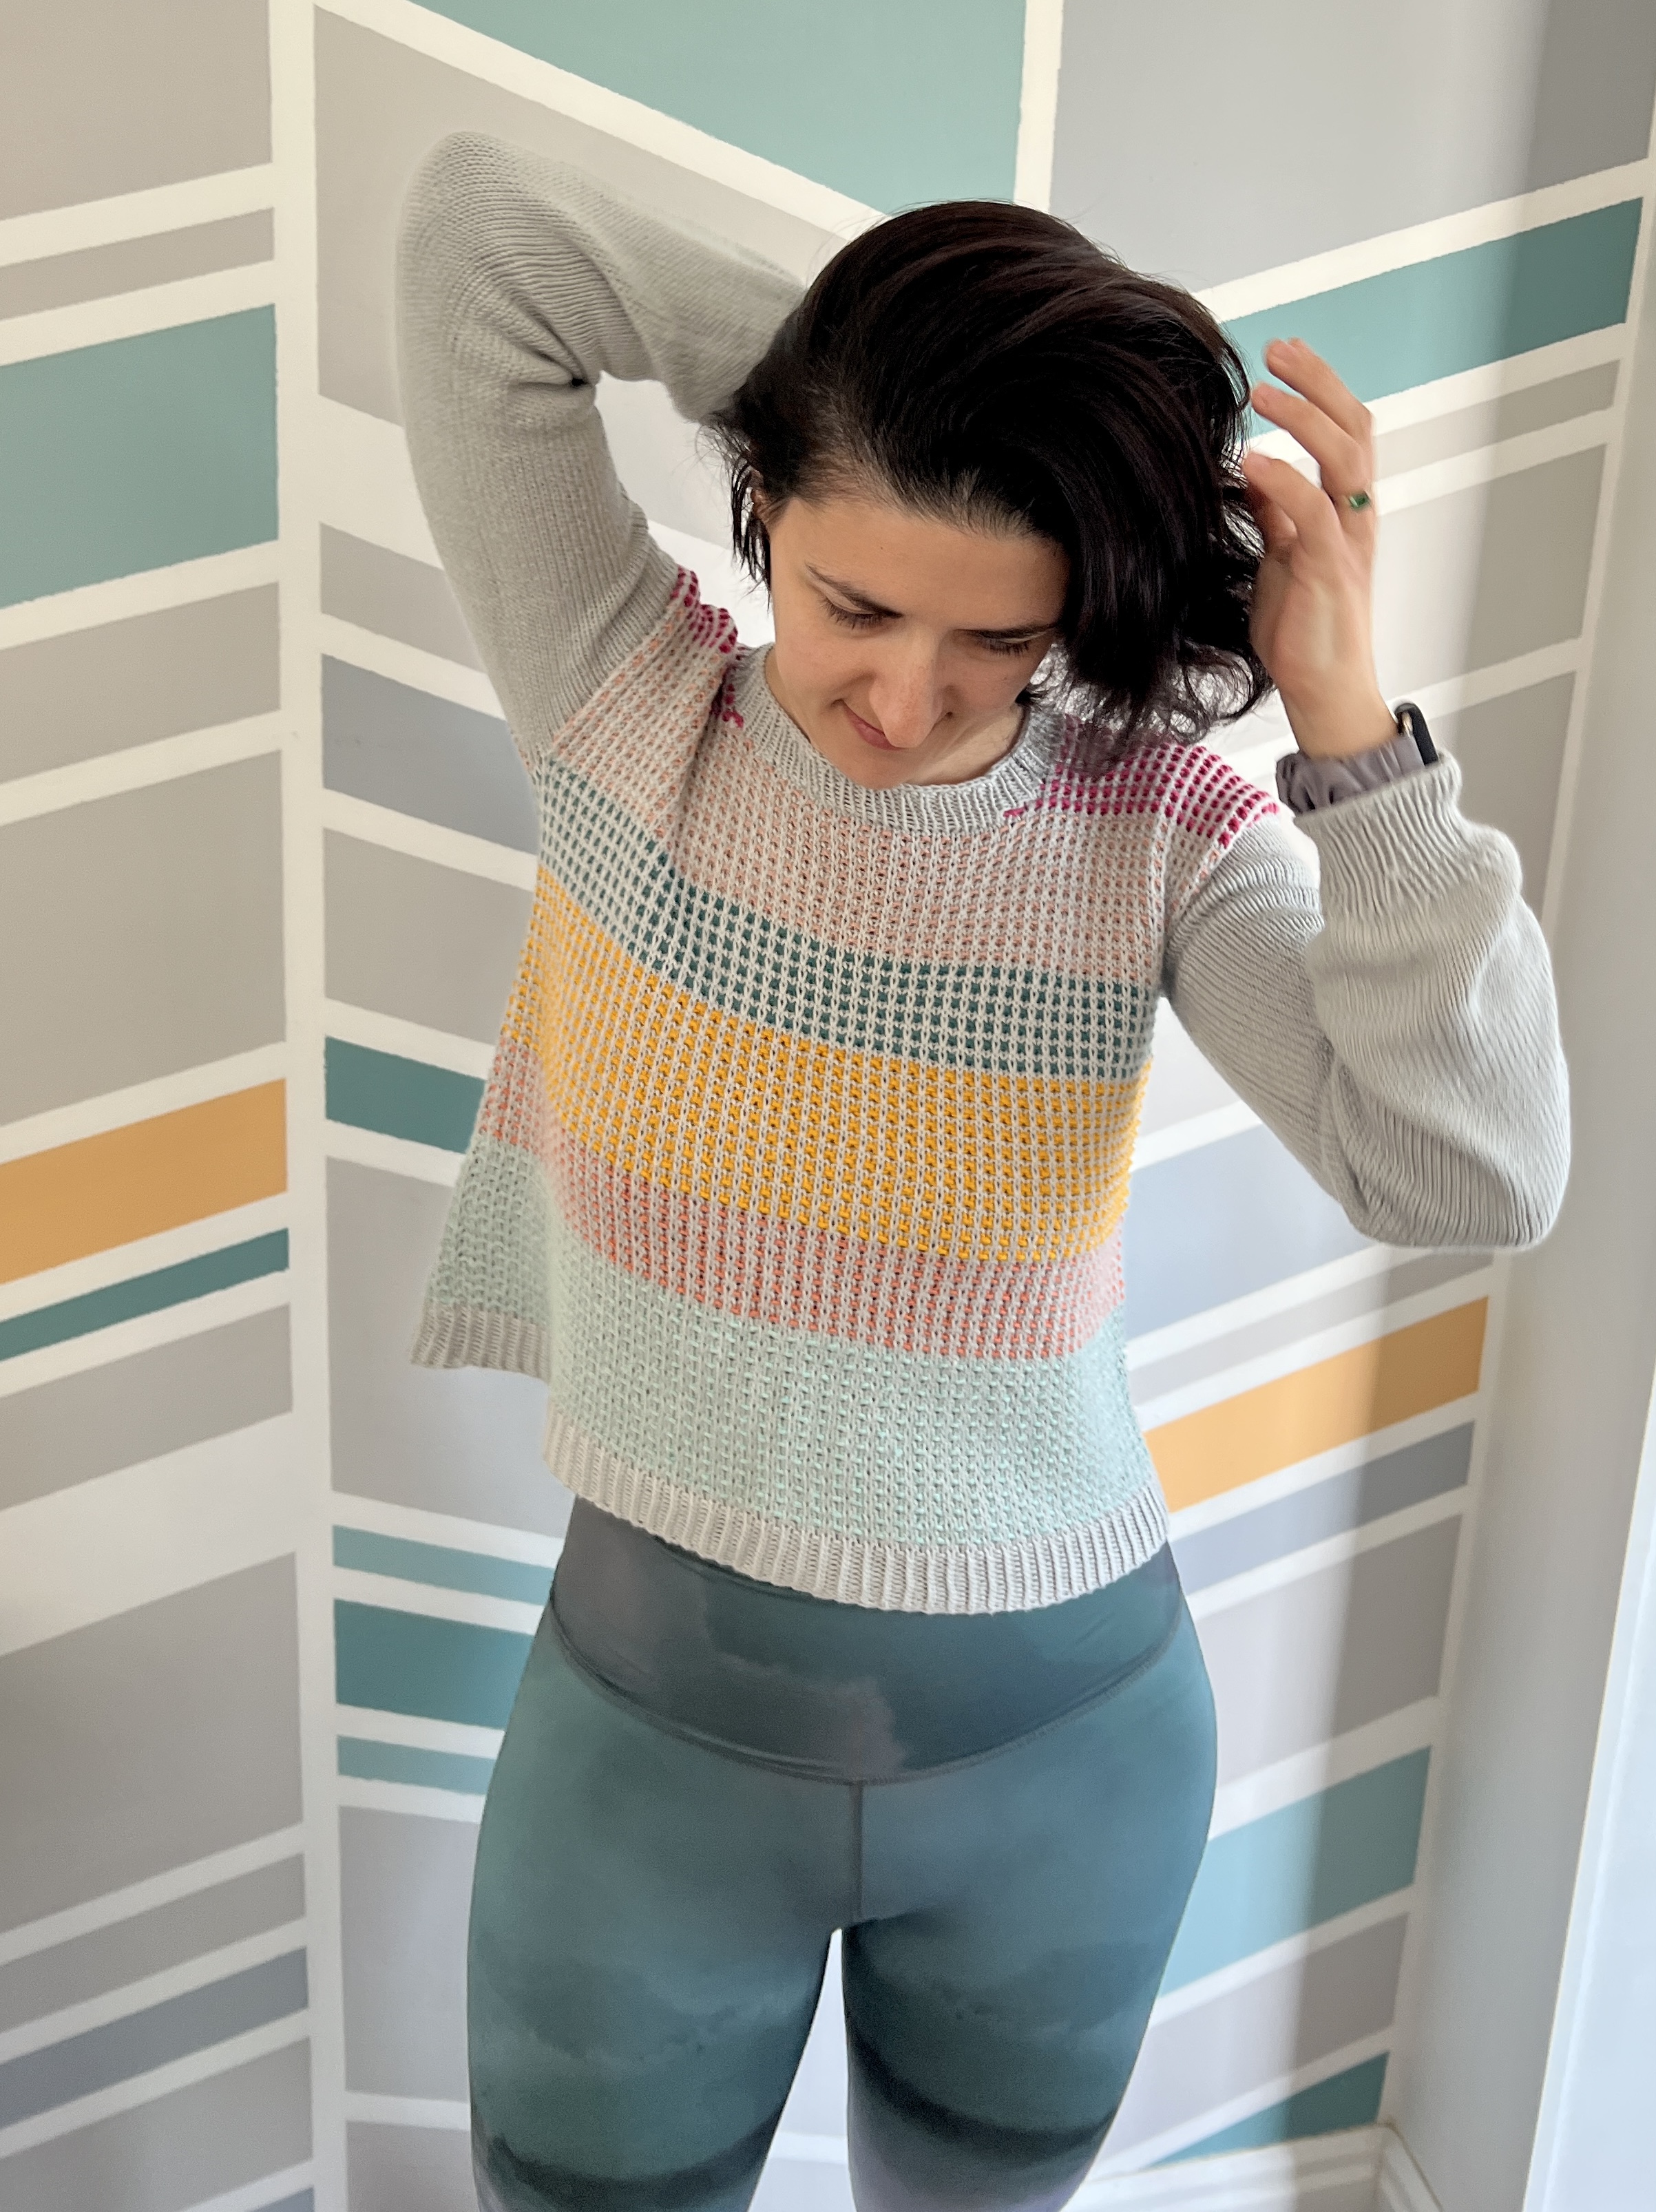
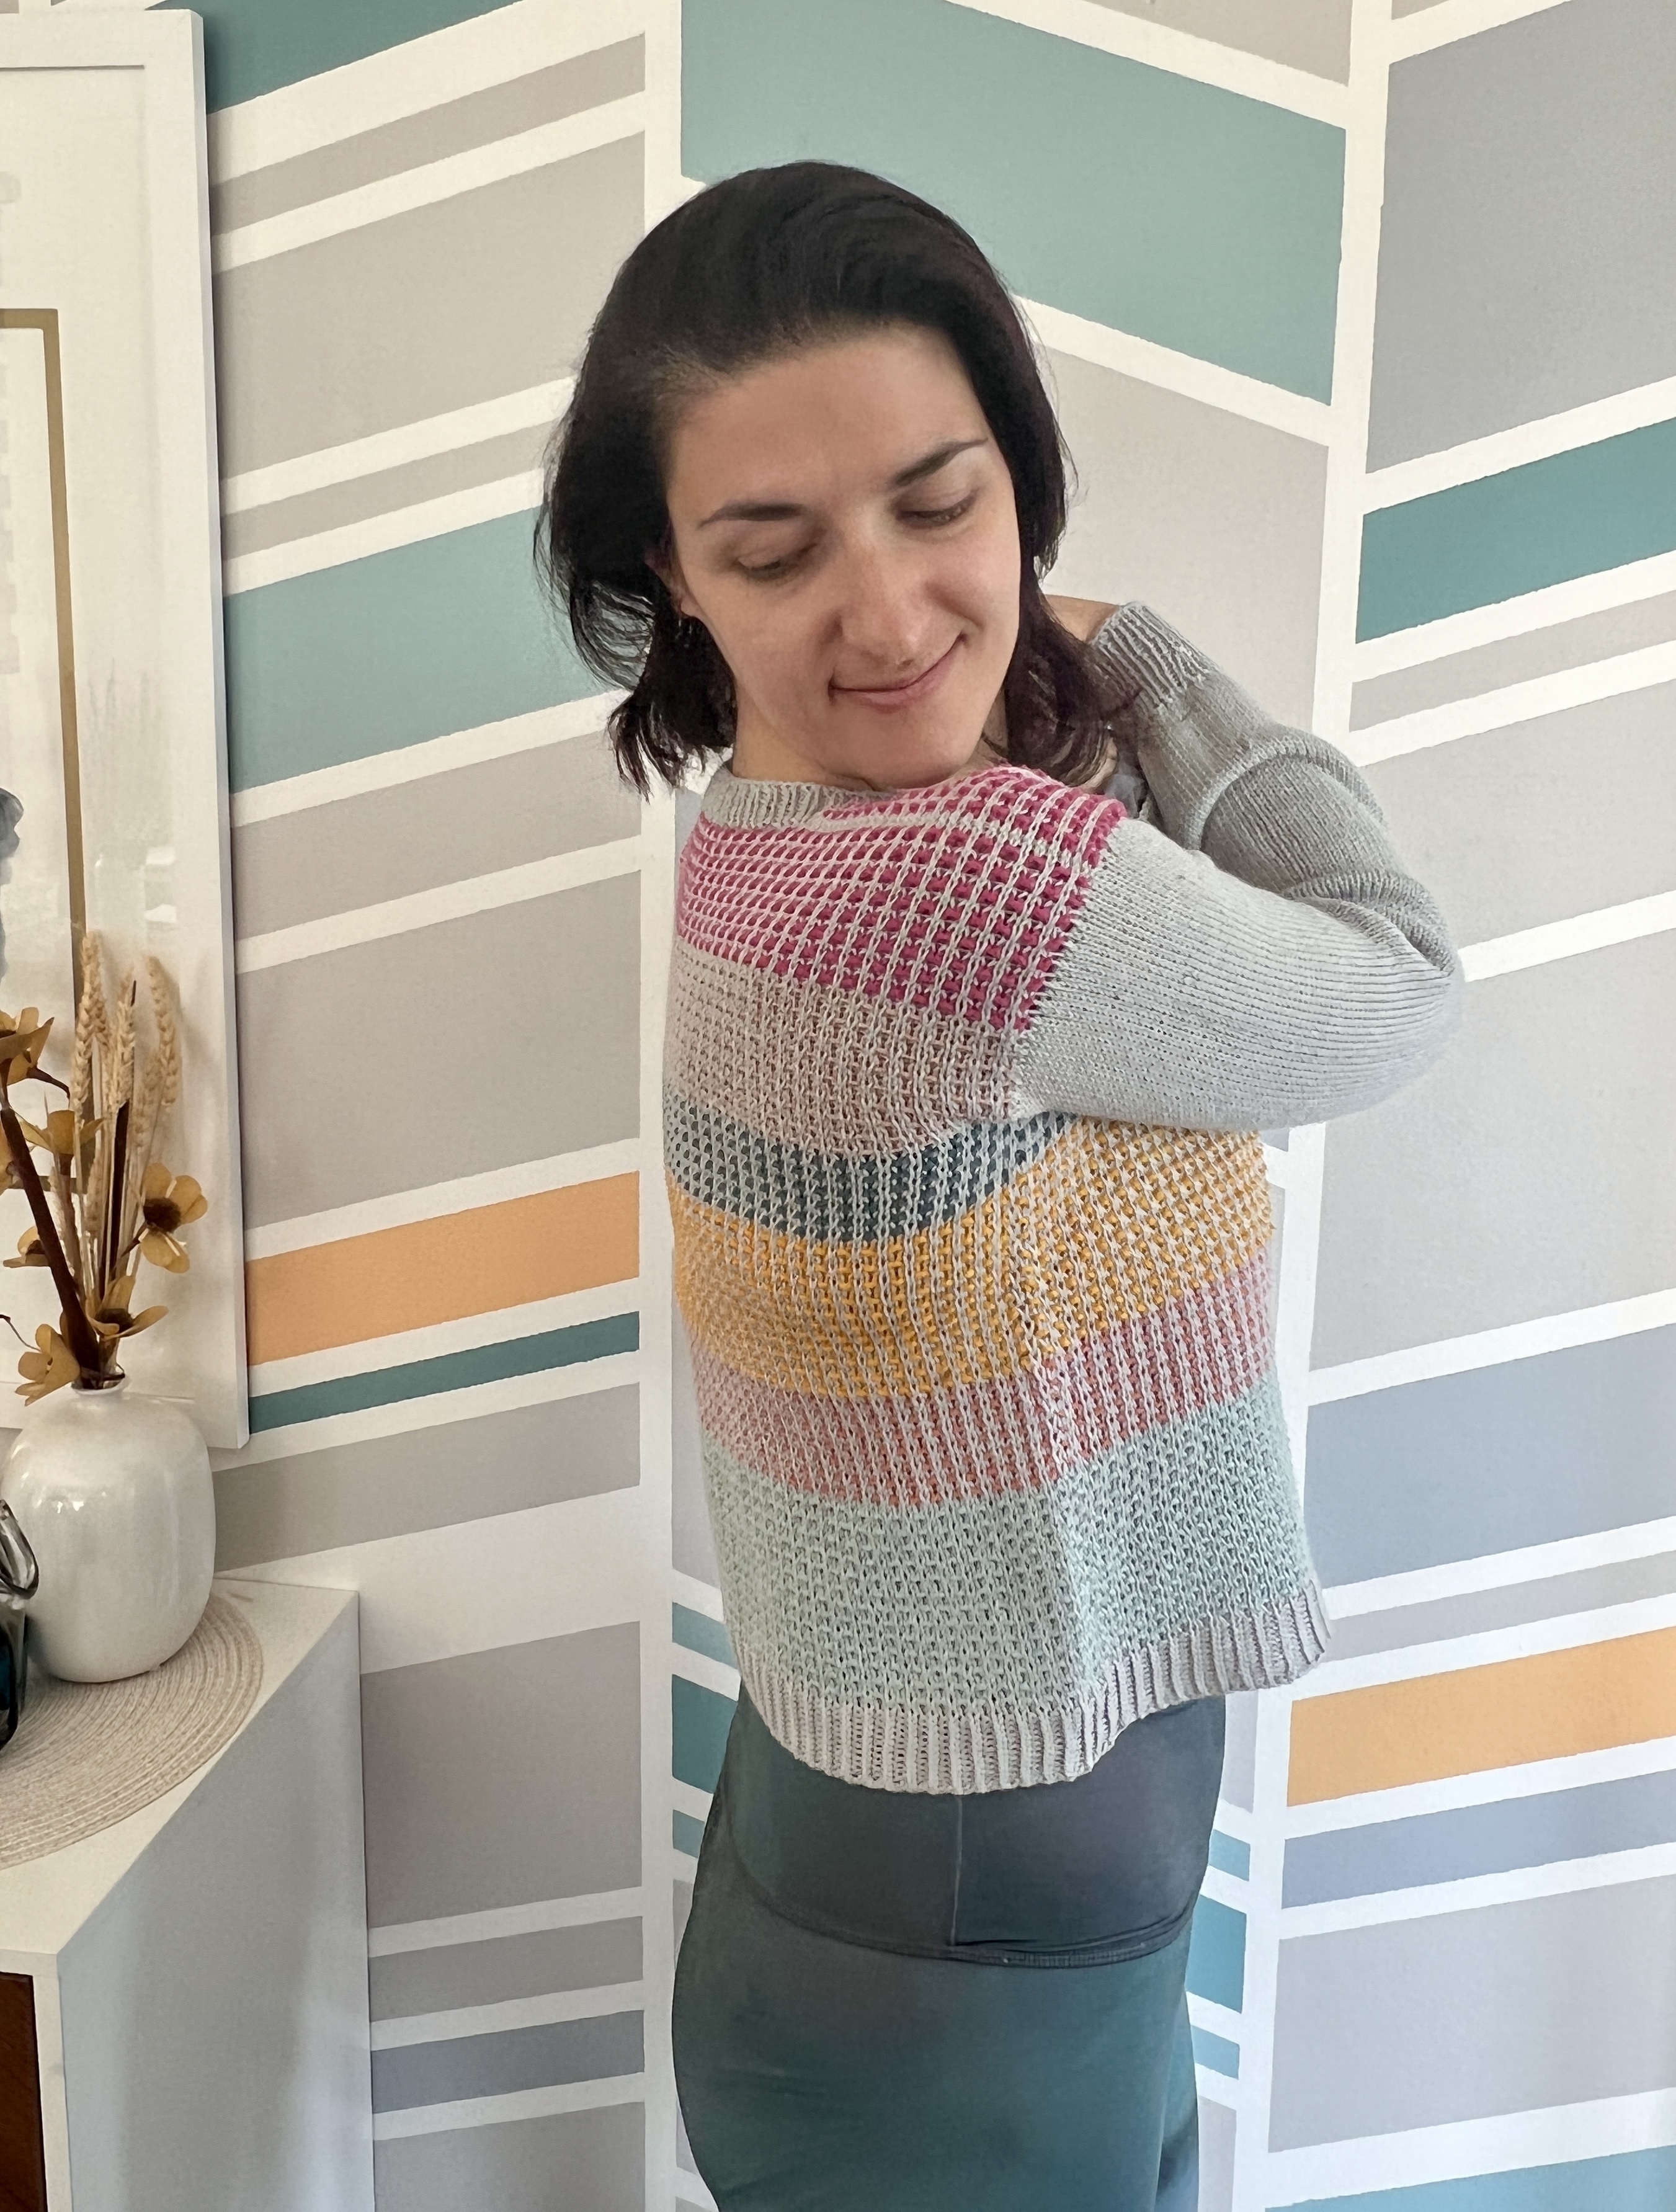
I decided to break the ice with the simple but oh so colourful Peach Fuzz sweater, paired with some wonderfully soft Sami 100% organic Pima cotton yarn I brought back from our last trip to Peru. The purple yarn used for the yoke is also Pima cotton, it’s the Pima Cotton DK from Cloudborn Fibers. I’ve had this in stash for such a long time and absolutely LOVE IT (some of you might recognize it as I’ve used it for a snowflake sweater before) and although it’s not as light and airy as Sami, I thought it paired well for the more structured rib parts of the sweater.
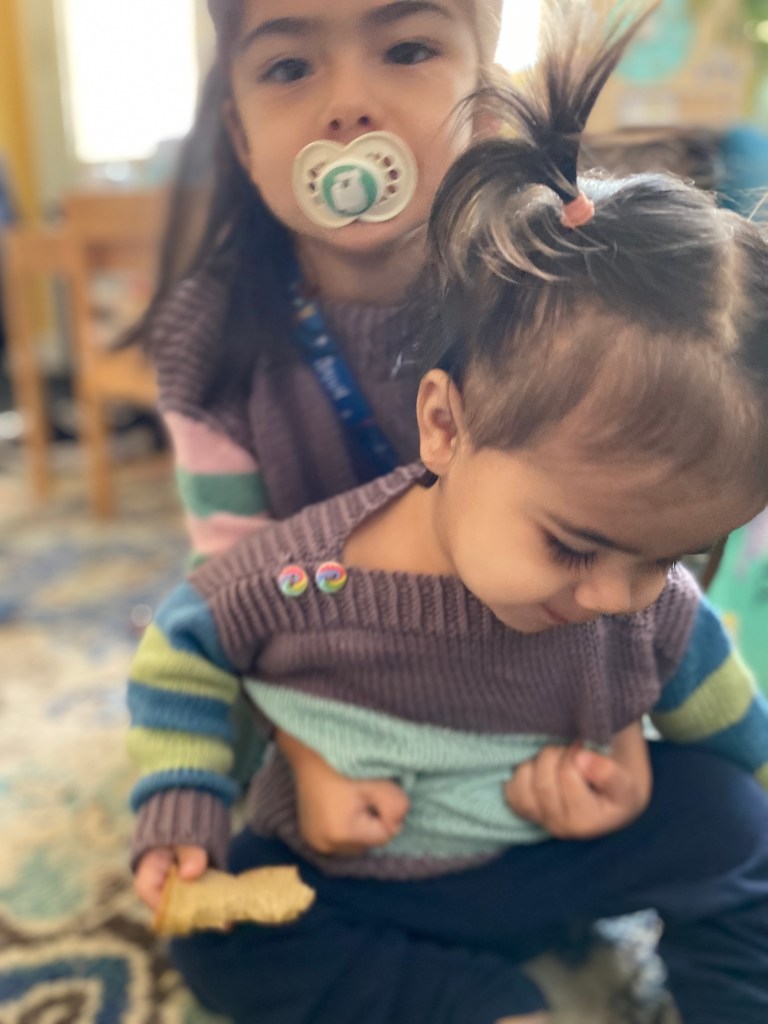
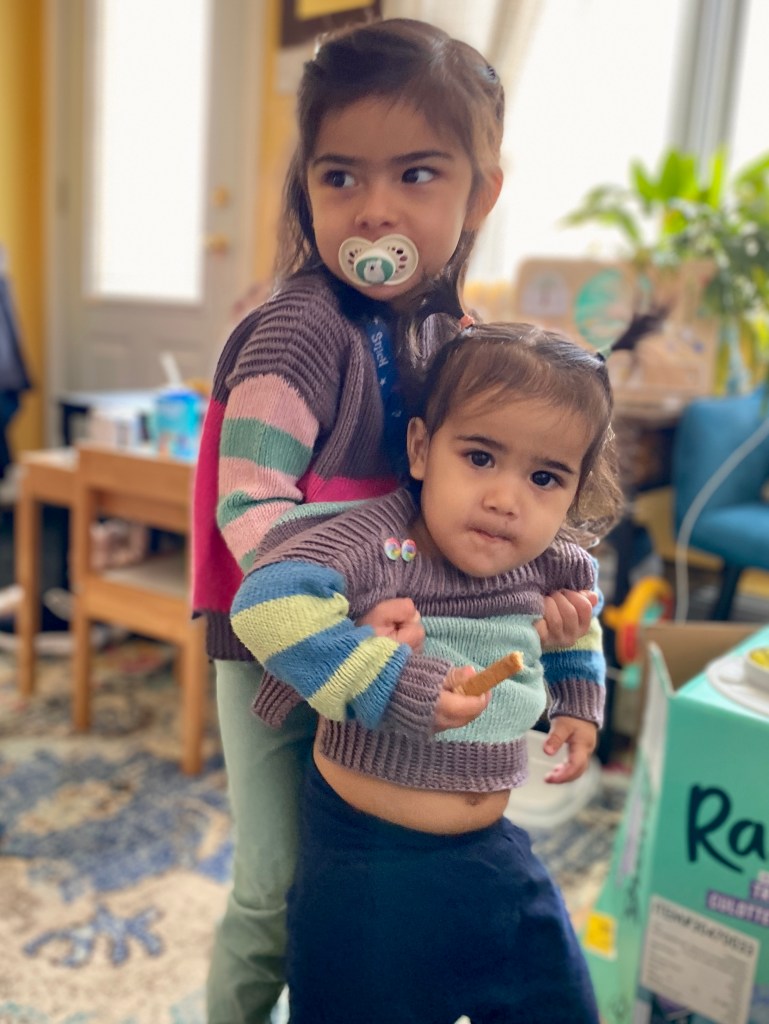
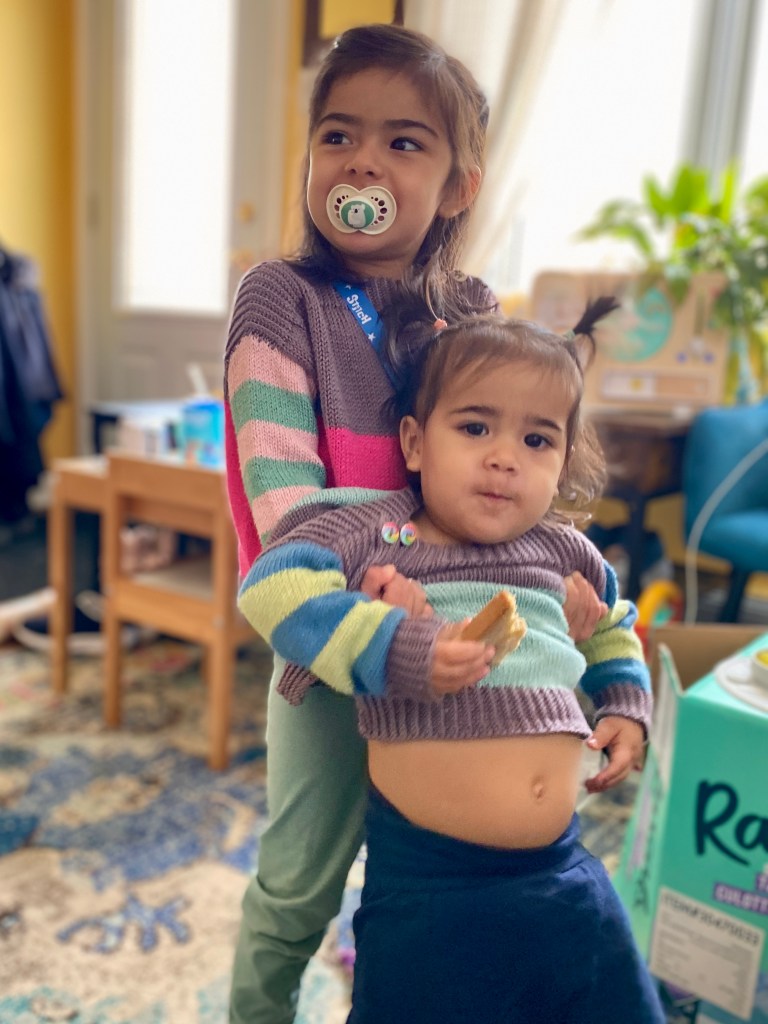
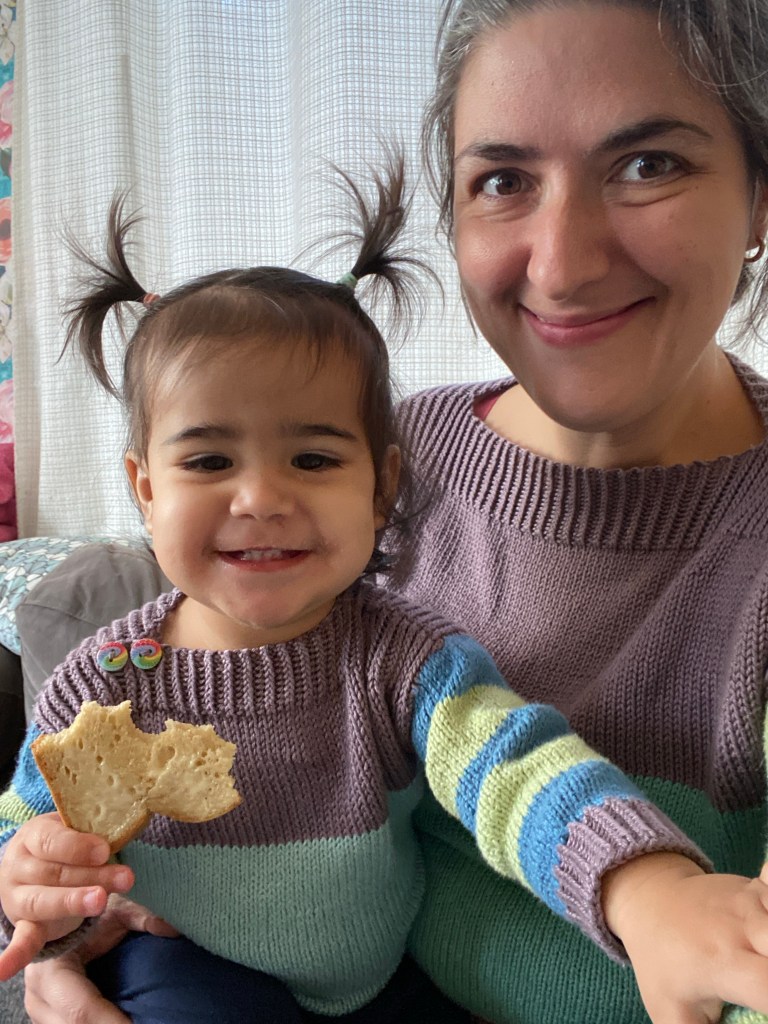
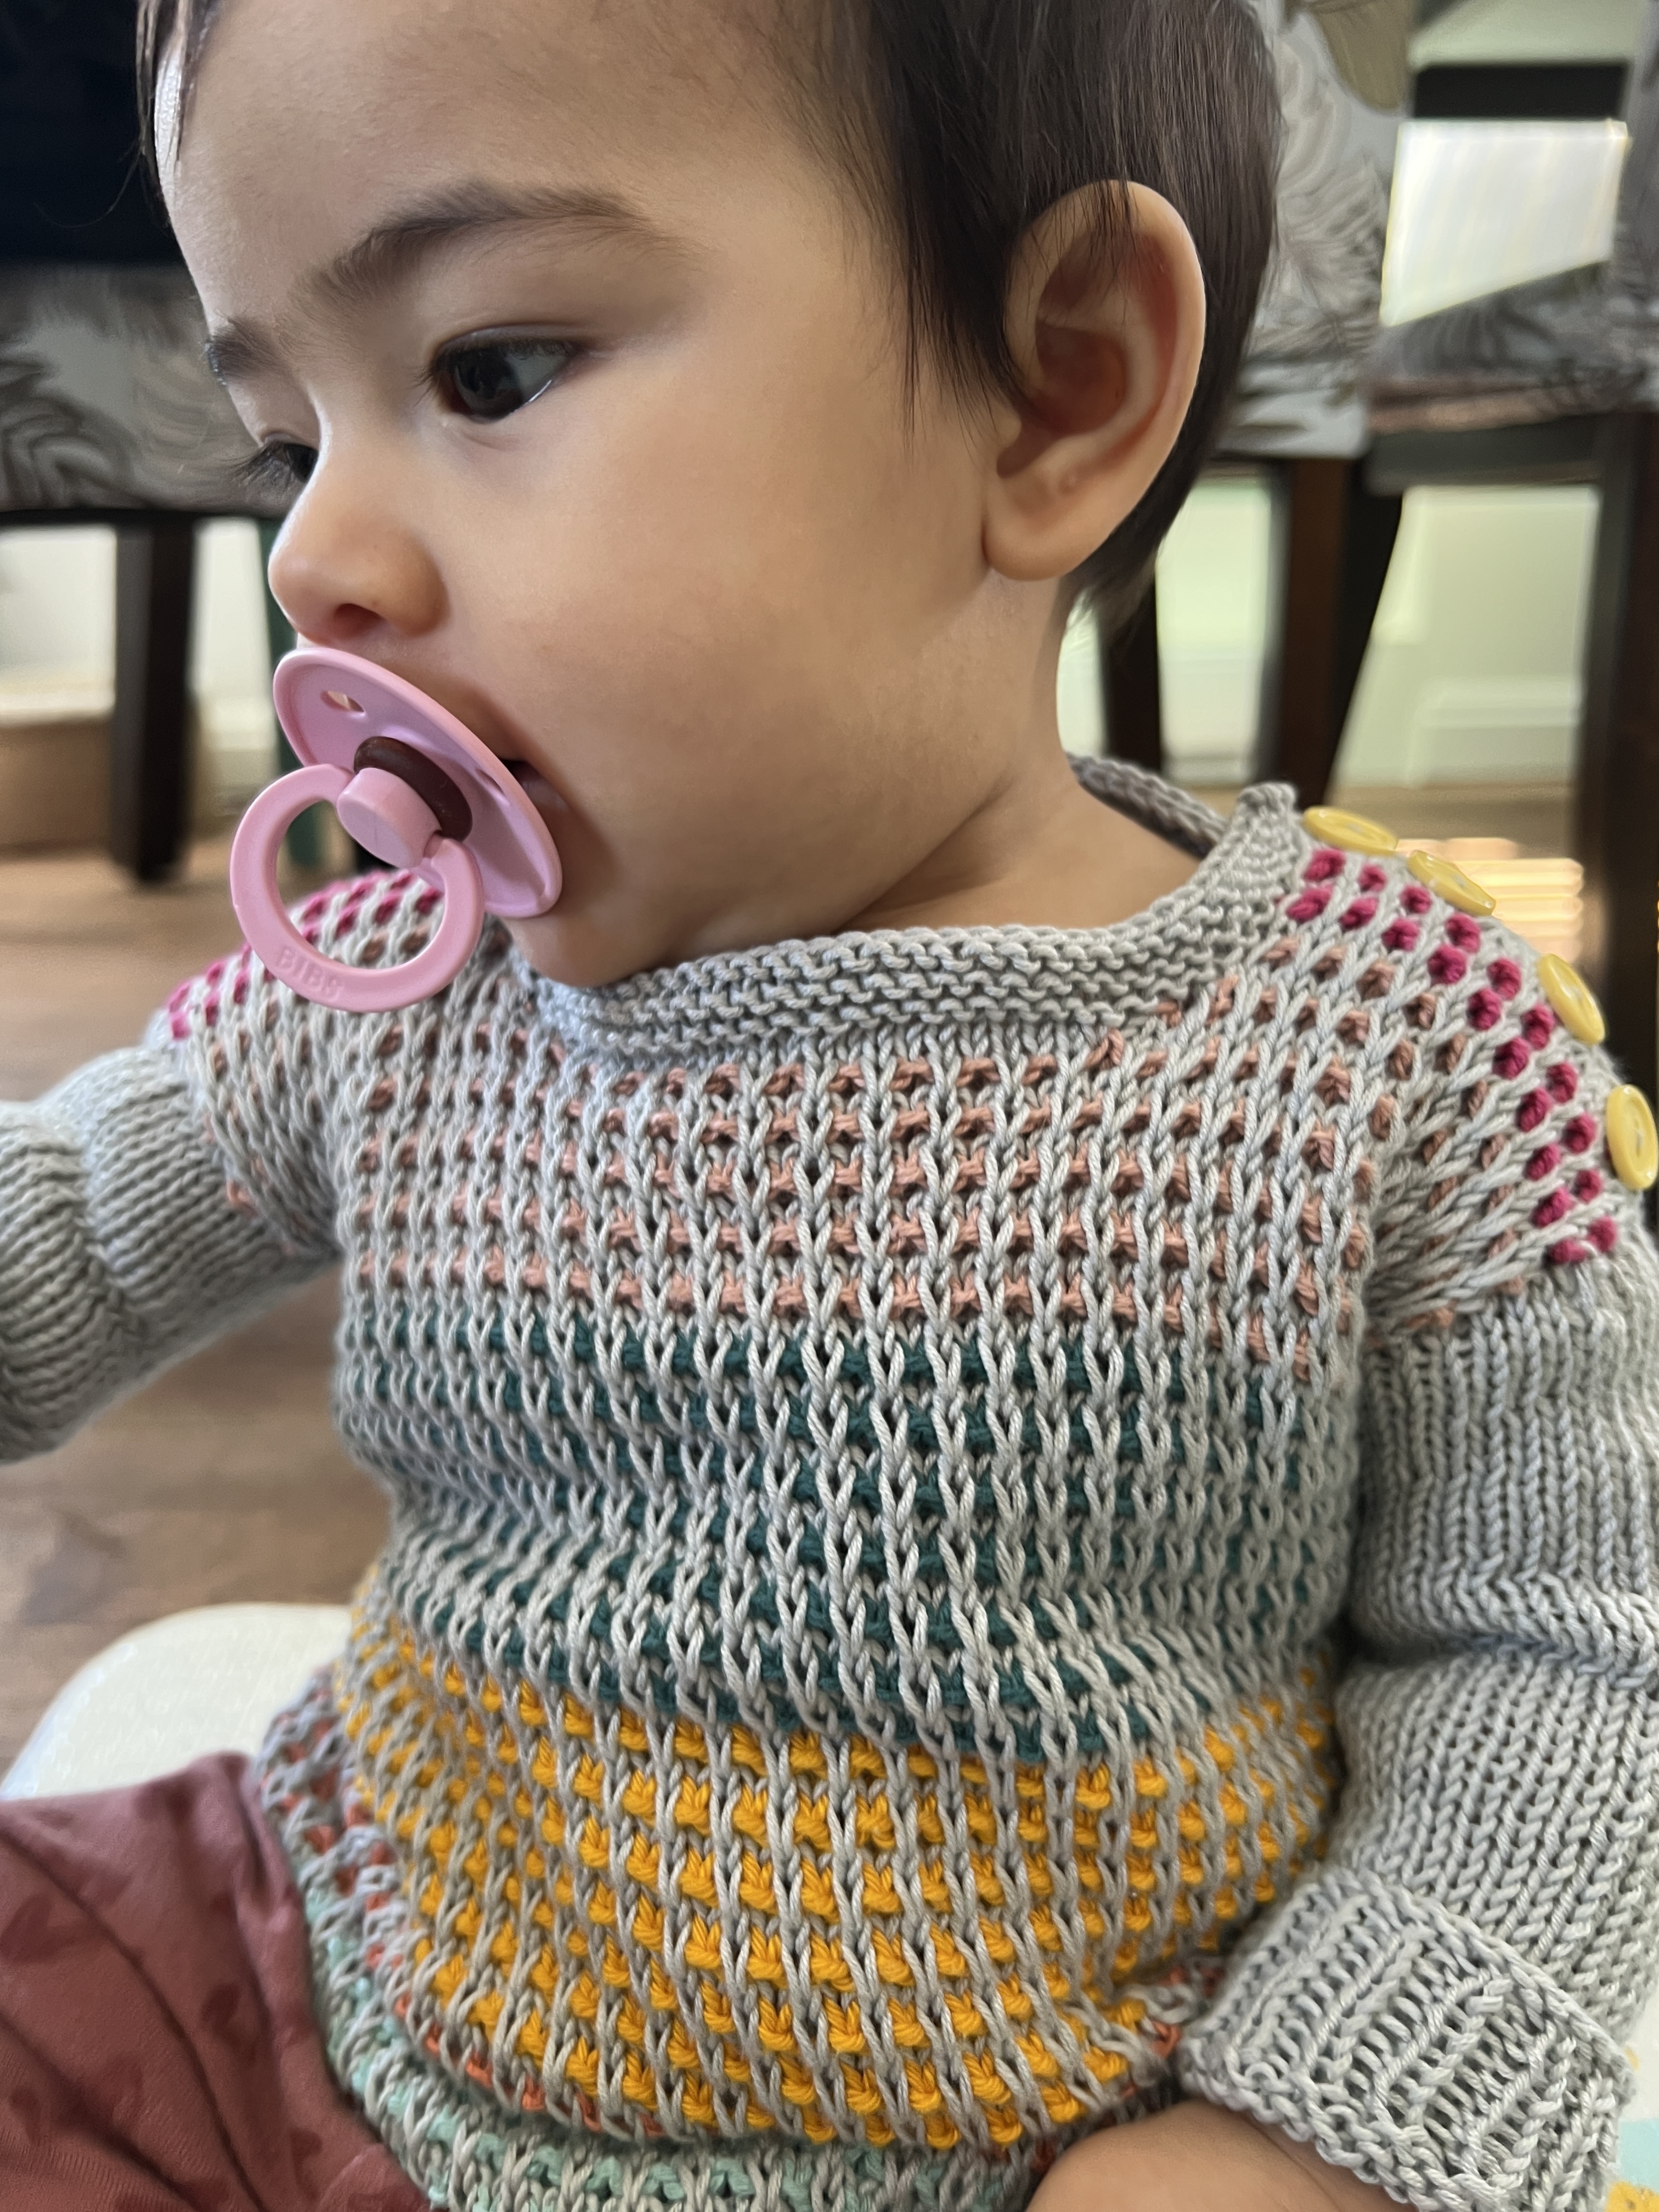
And because I loved this piece so much, I couldn’t make just one… so I made three – one for me and one for each of my girls. Can I just squeeeee over how cute this little trio is?!
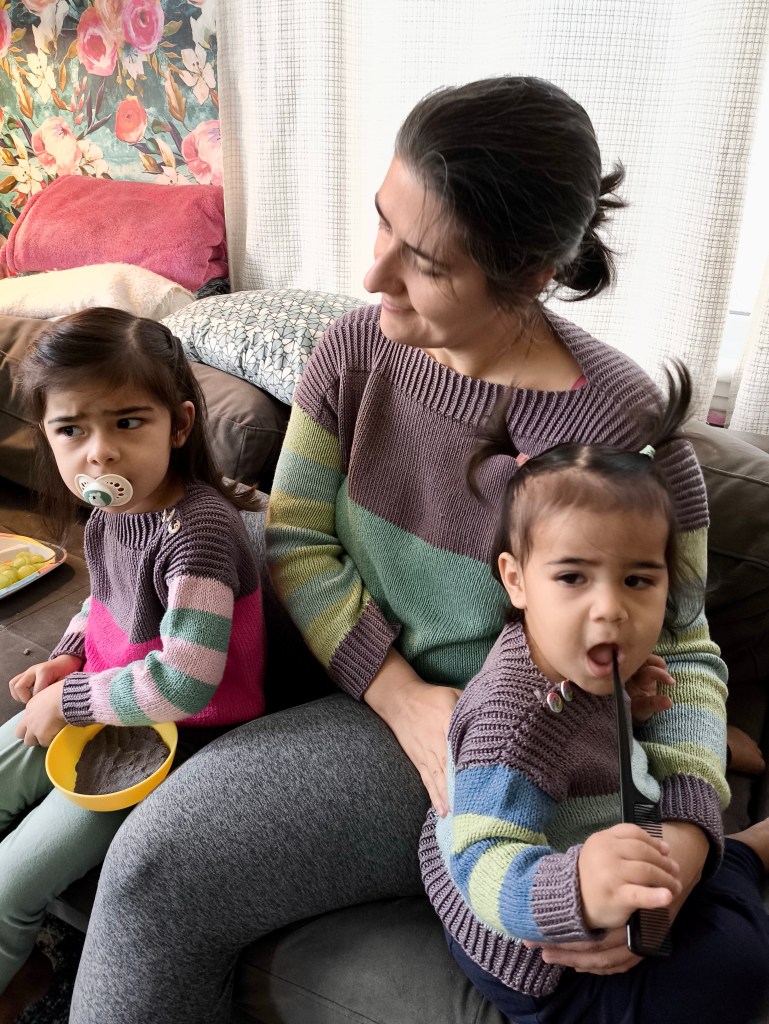


For my own, I followed direction for the smallest size and used 68 sts sleeves. I made no other modifications to this wonderful design.

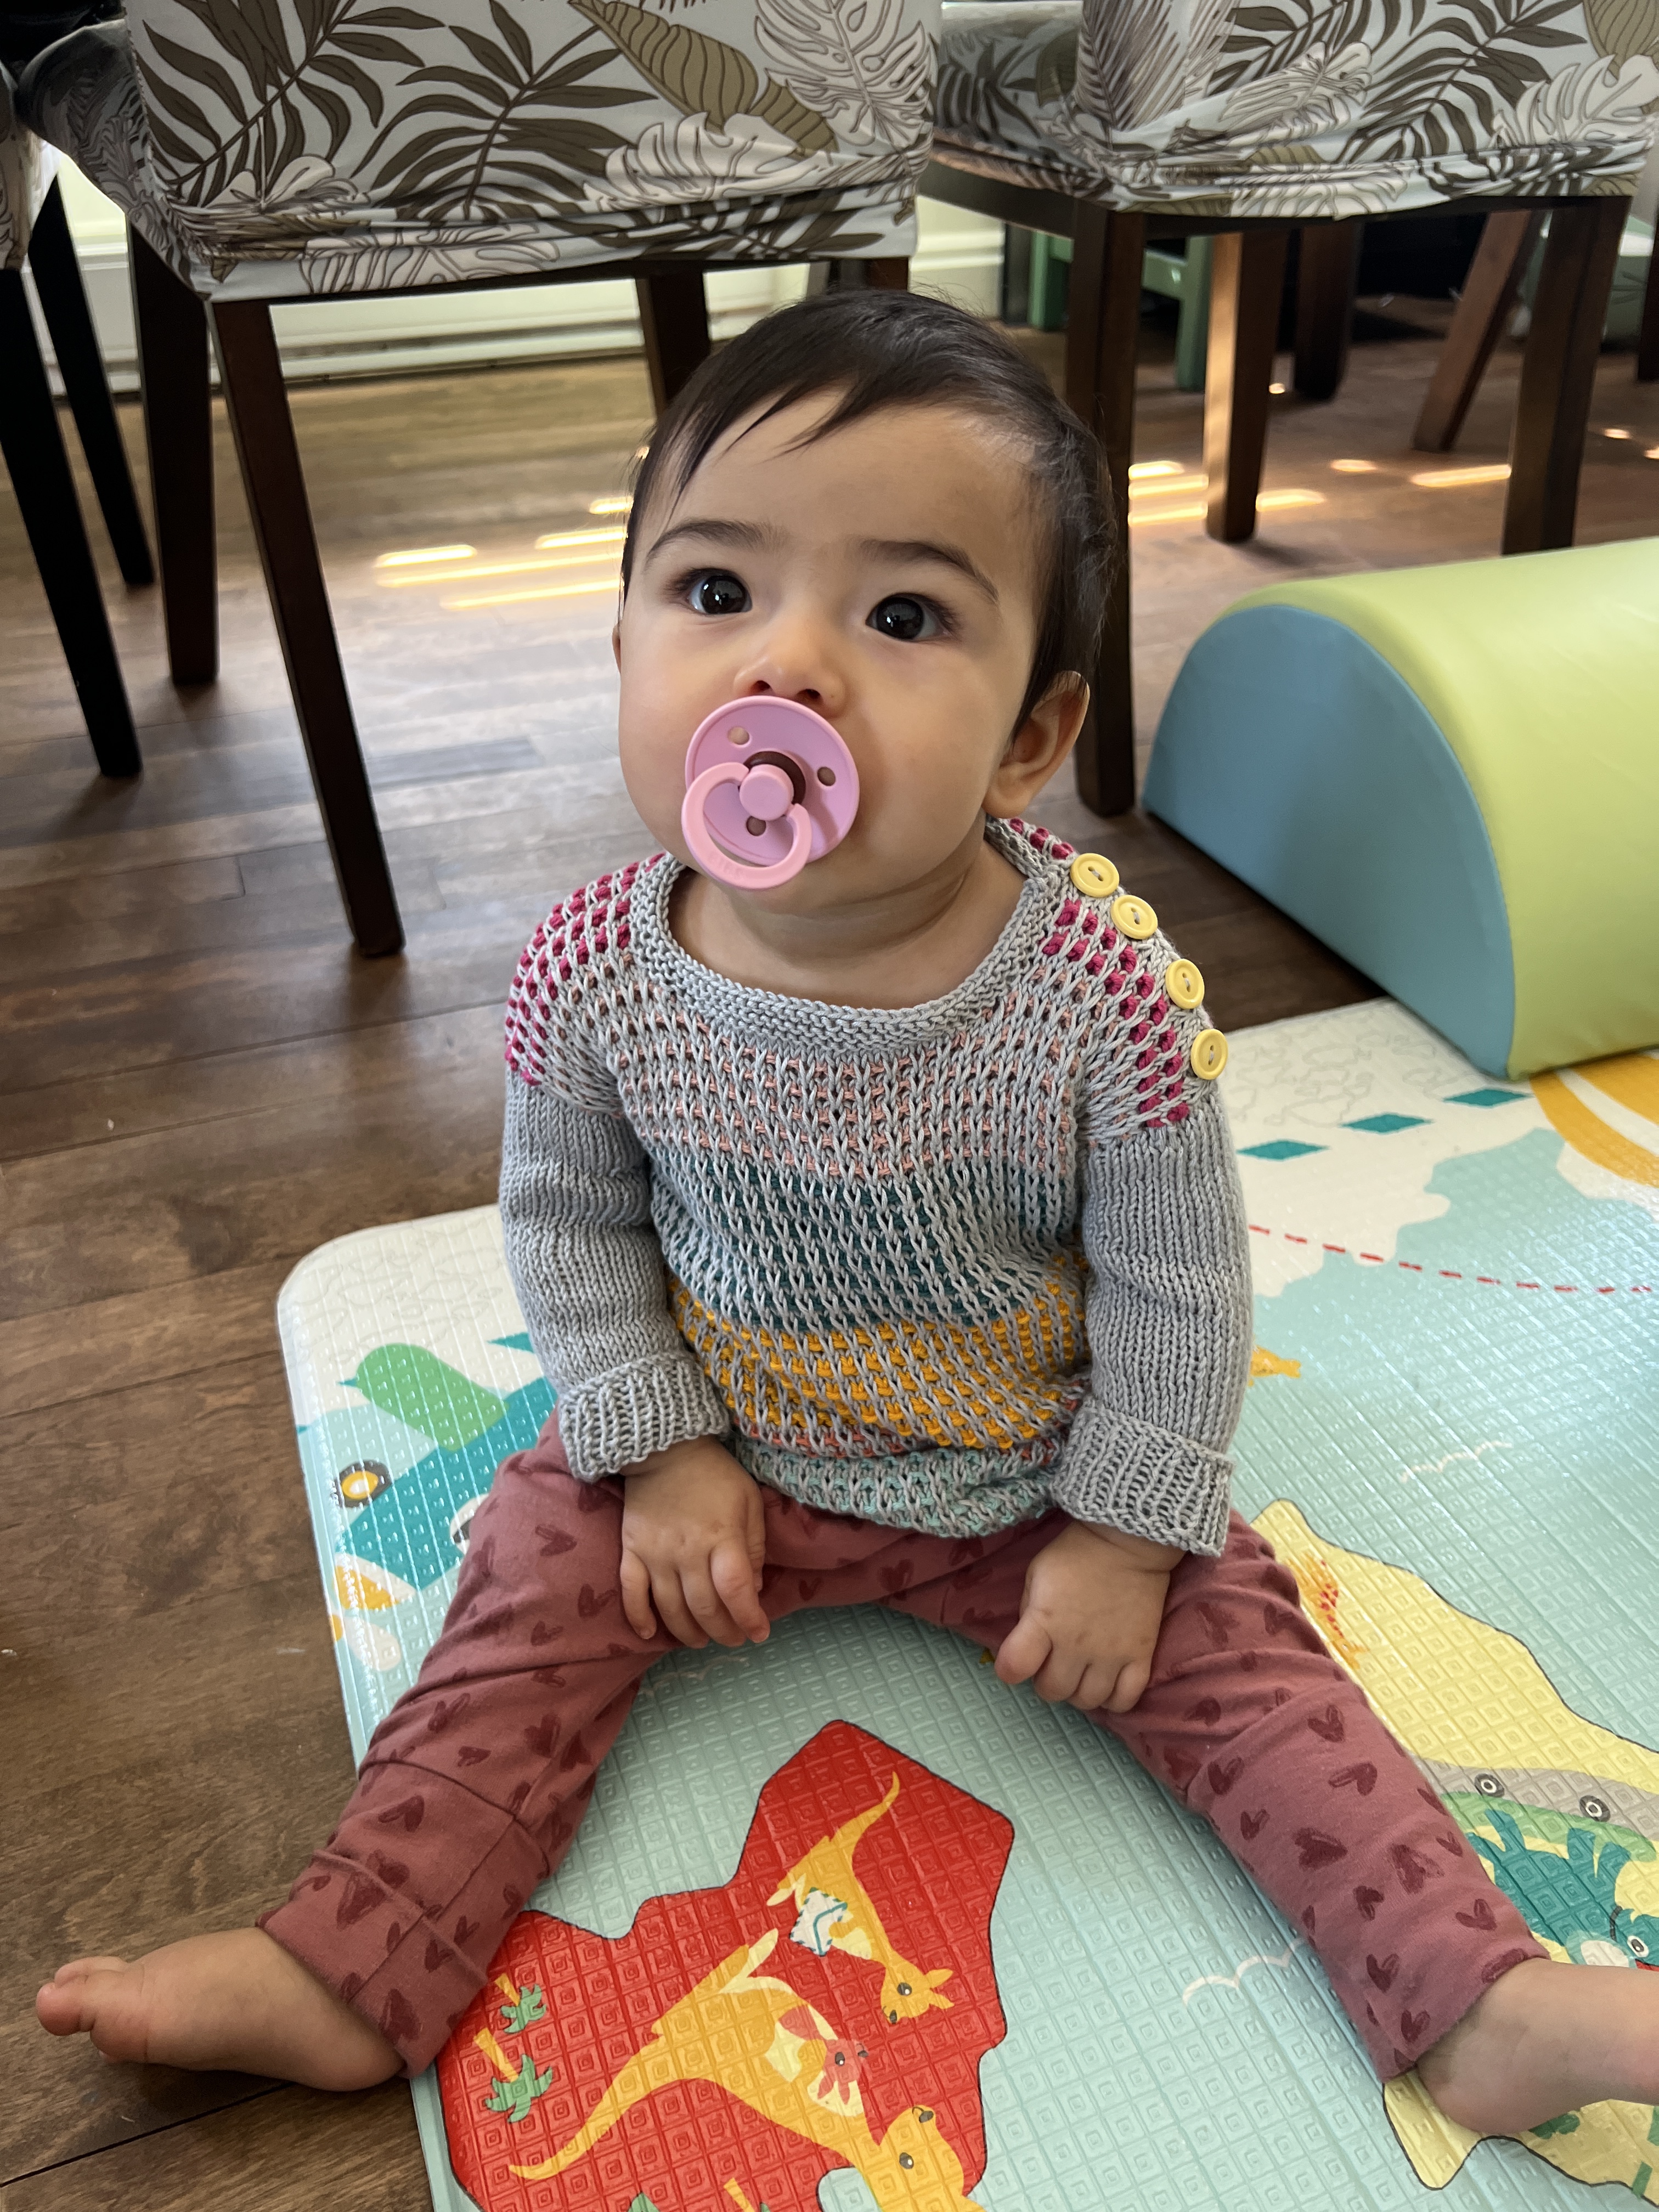
For the girls, I obviously had to whip up something a bit different since the book doesn’t provide child sizes. All the details for each sweater are provided on my Ravelry project page (here for the 2T version and here for the 4-5T) but basically I changed the neckline to add buttons and changed the striping sequence on the sleeves to accommodate smaller little arms.

That’s all folks! I’ll have another matching kit to show you again in a few months I’m sure, so until then, take care 🙂
Mini sweaties
Why is it that sometimes it seems like everything in life is all happening at once, and you just can’t seem to catch up with it all? The past couple months have been a bit like that.
Work brought me to Labrador, Canada in late February, then serious family matters unexpectedly brought us to Peru in March and then it’s just been a blur of private and professional meetings, trips and hotels, important decisions and a whirlwind of emotions. While we are still somewhat in the thick of things, I am trying my best to get back into a slower and more predictable routine to gain a bit of a better ground.
It may not be much, but I think taking the time to sit down and share the last few projects I’ve completed (even though they’ve been finished for months now) is a step in the right direction.
Both sweaters I’m sharing today have been made for my daughter earlier this winter, based on knits I’ve made for myself in the past. They are both large enough that they should fit for a year or two, so hopefully I’ll get a lot of wear out of them both.
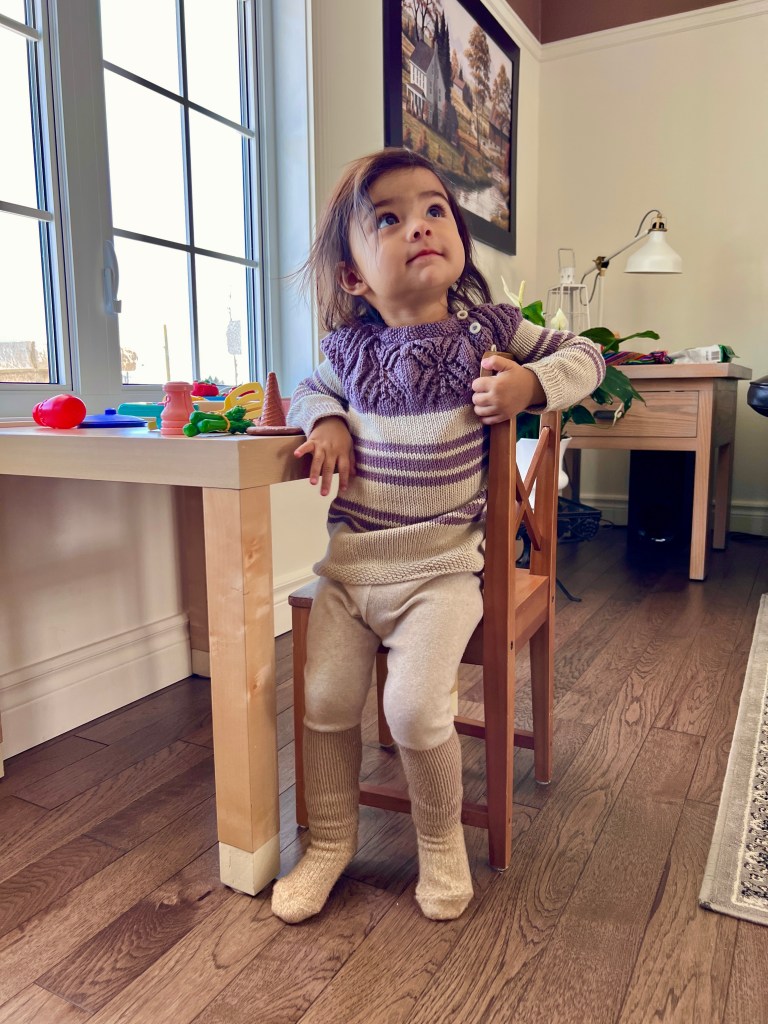
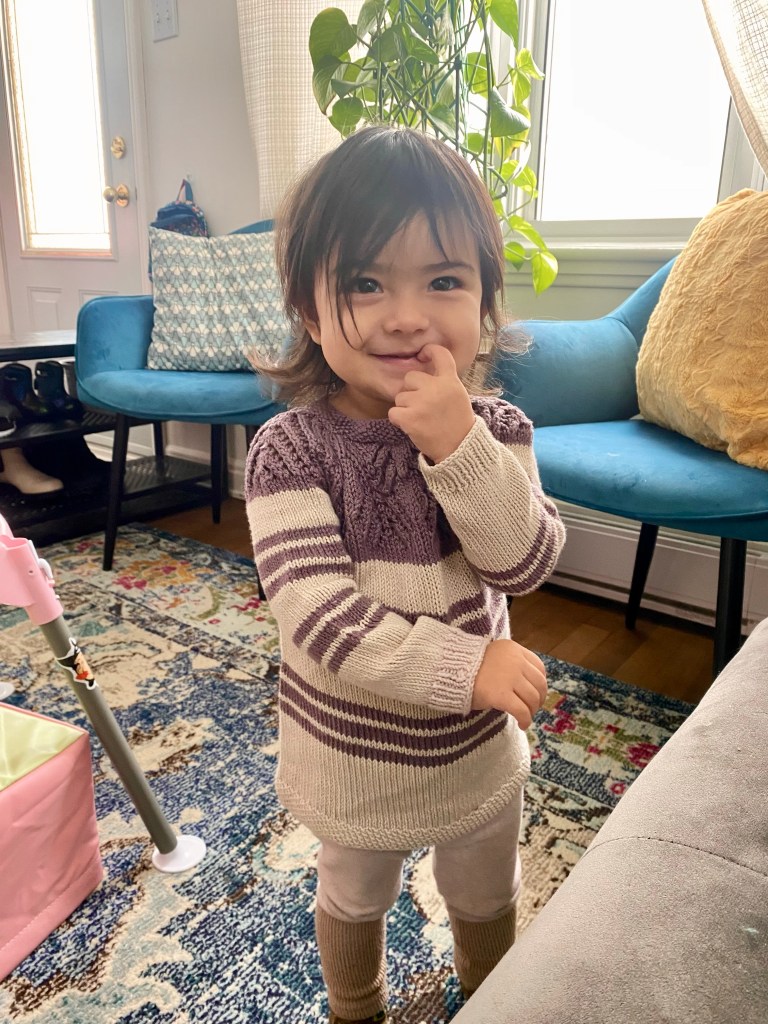
The first one is like to share is this adorable midi snowflake sweater based on my own made in 2018. While the yarn used is different, I used the same striping sequence in similar colours. The light coloured yarn is my ever so favourite Berroco Modern cotton DK in colour Piper and the purple yarn was a new discovery for my (though I think it’s now discontinued) Pima Cotton DK from Cloudborn fibers. I ended up knitting the cuff on the last sleeve using leftovers from a different yarn as I miscalculated and ran out of yarn before completing the second sleeve. I did not want to break out a new skein for just the cuff so I hunted down something similar in my remnants and rolled with it. Overall I think it’s barely noticeable and someone who didn’t know who probably never notice. As usual, the snowflake pattern was a pleasure to knit. It’s my thing snowflake now (first child version) and I just find is so elegant. I always mess up the setup somehow though, but I guess that’s a minor inconvenience.


The second sweater I’d like to share is this adorable coral mini Raindrop. I guess saying it’s “based on” my own version would be a bit of a stretch as the colour, yarn, sleeves, edge and cuffs are different but I guess one could argue it’s been inspired by. The yarn I used for this one is a lucky find – earlier this winter I went to my local dollar store and found this coral Truboo yarn from Lion Brand. Let’s just say that at that price it was just a real steal and couldn’t pass this golden opportunity. And let me tell you – this yarn is just so incredible soft! A real dream. Though it does tend to pill fairly easy, but I really can’t complain.


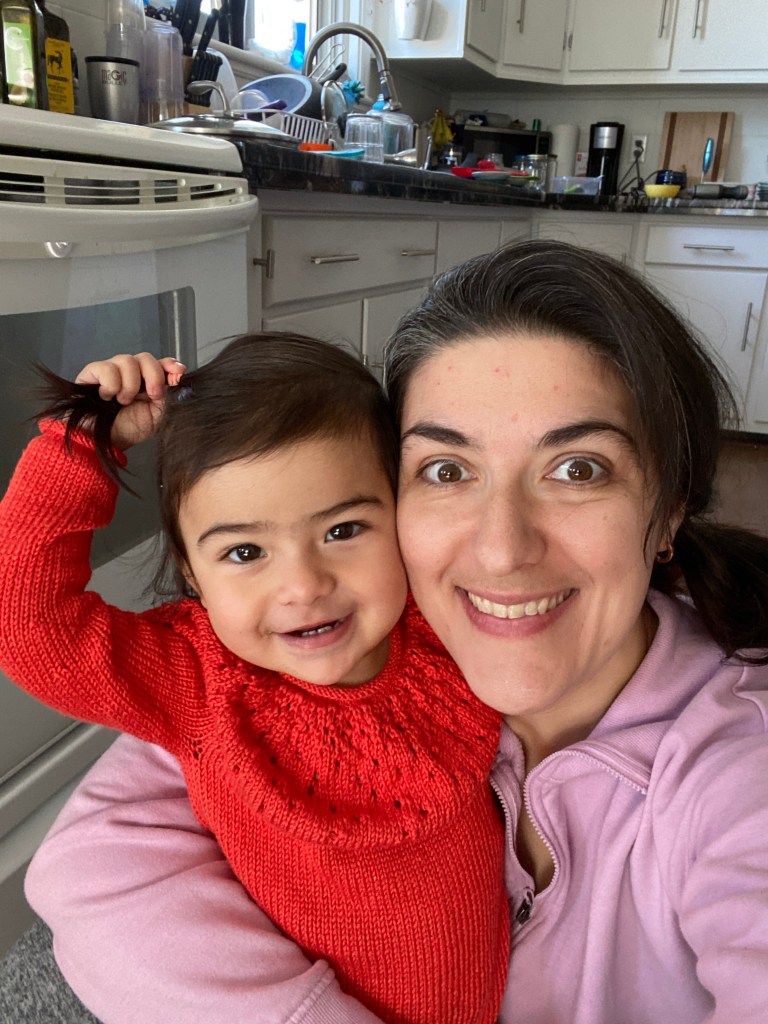
I was lucky enough to put my hands on a few skeins of the same yarn in a cotton candy pink colour as well, and I may be working on a pair of matching summer tees with it. If you’d like to see, make sure to keep an eye out for the next post 🙂
Until then, cheers folks 🙂
Making Peace
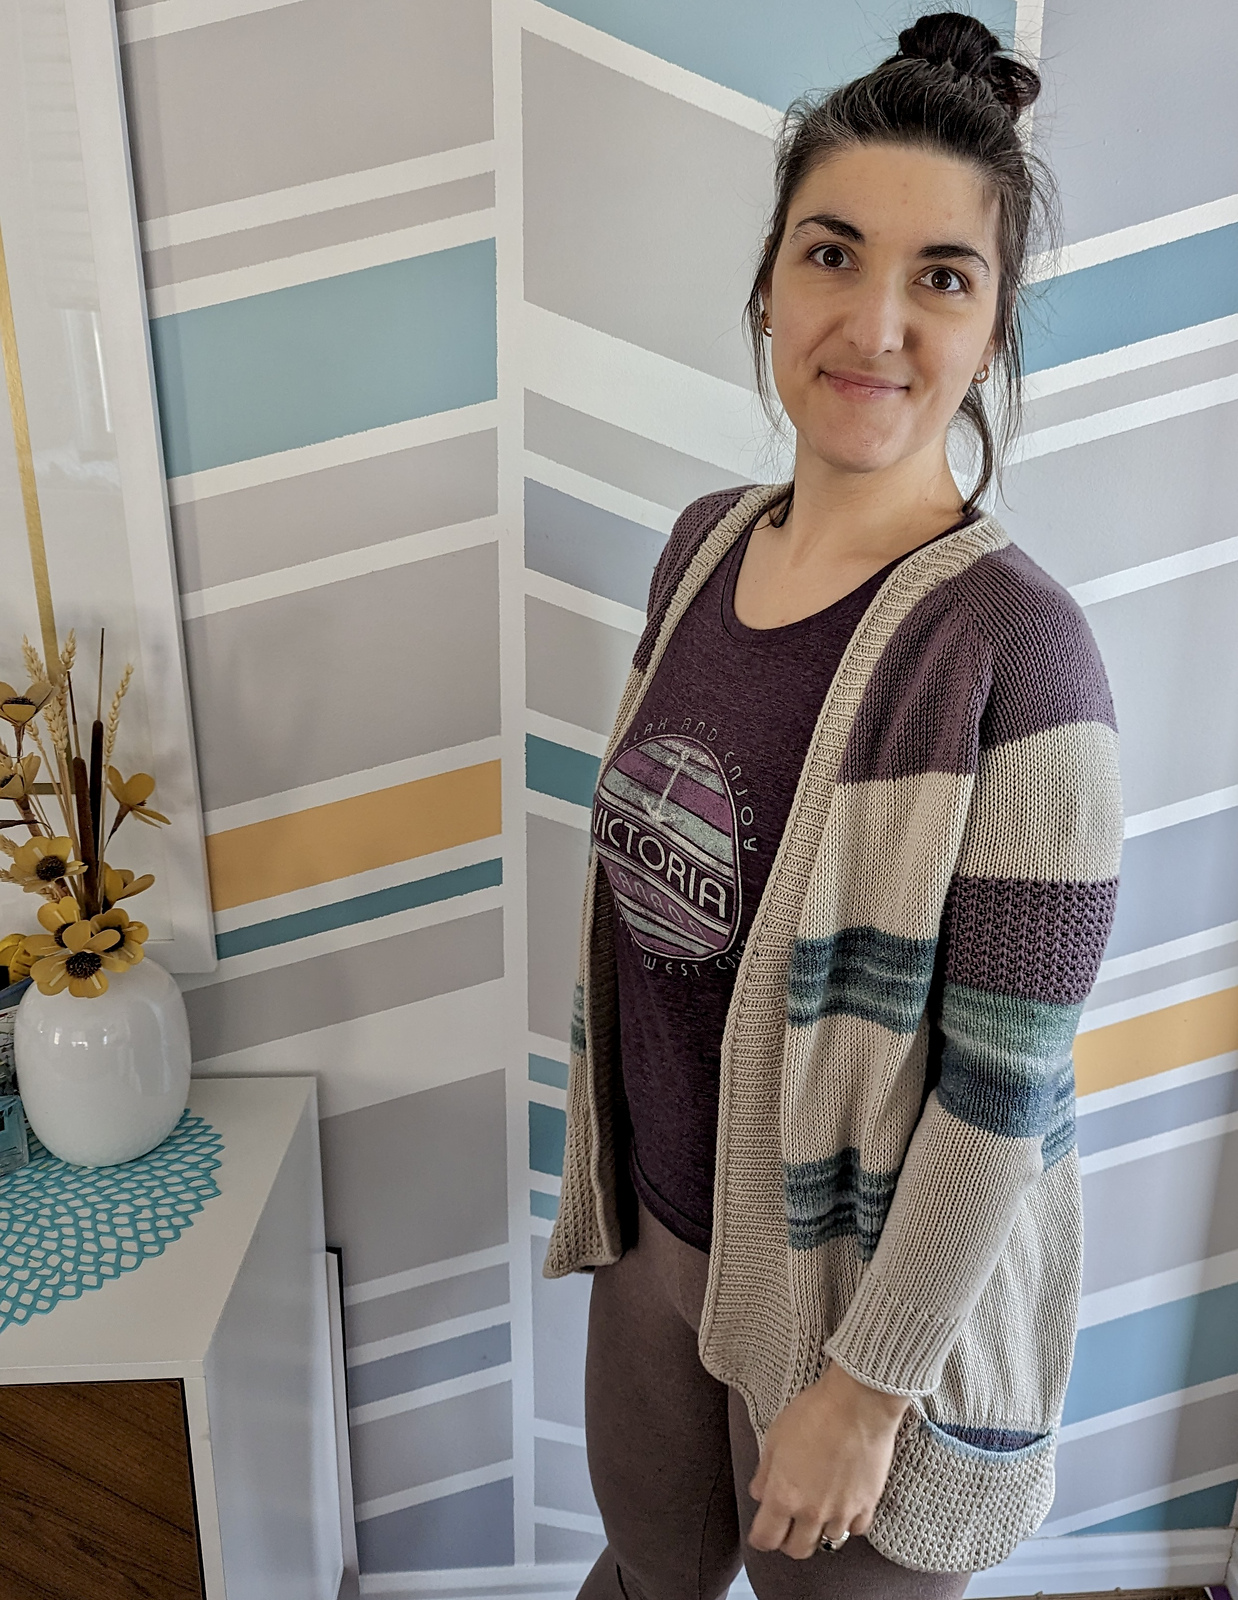
It seems like everybody and their mother all have knitted a Bluesand Cardigan before. And with over 2700 projects on Ravelry, it’s one of the most popular cardigan patterns on Ravelry. And anyone who has seen this design before knows why – it’s so cleverly designed with distinctive small touches and details that really make this piece stand out. And now I finally have one, too! Though the journey to get there was not so simple. But first, let’s admire this wonderful thing in all its glory.


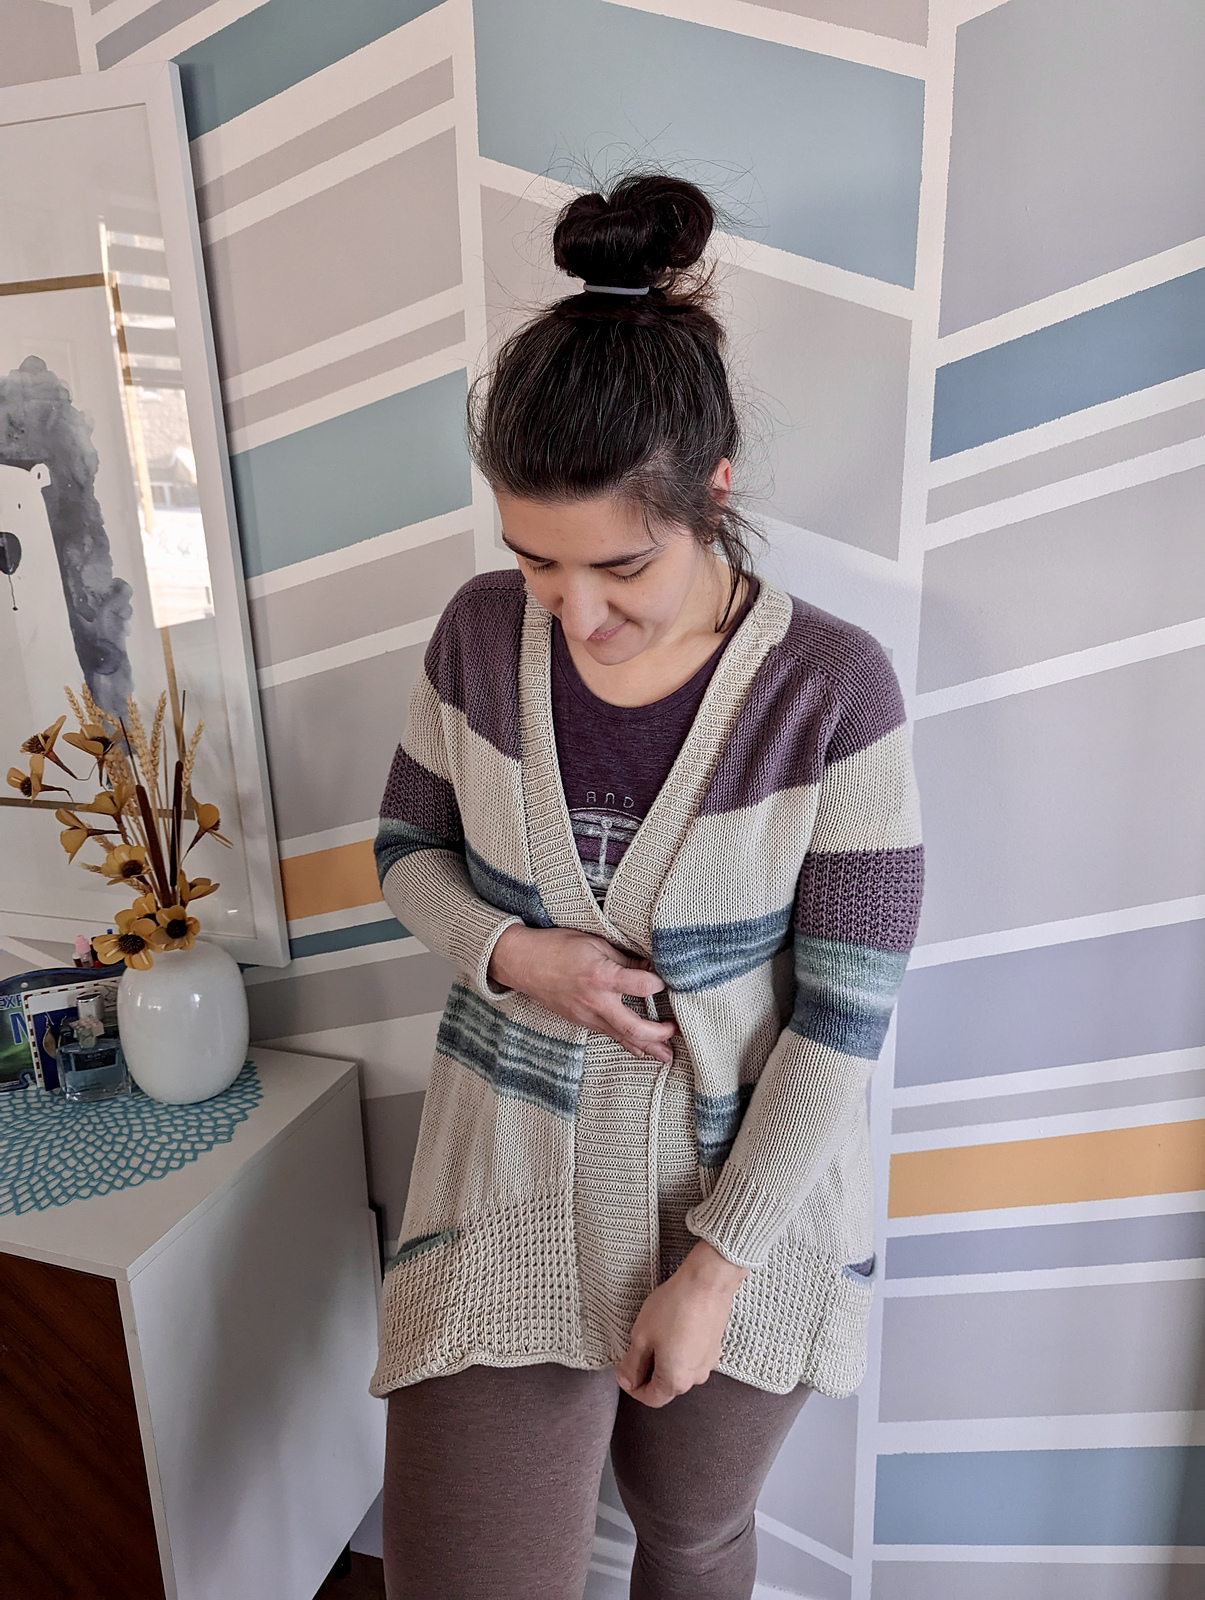


Now let me tell you a tale of times long past. Years ago, I had decided to cast-on this cardigan for the first time, hoping to use this design to feature one of my first handspun yarn. I had paired it with one of my favorite yarns at the time, Cascade Heritage Sock in two shades of gray. Guys, it was a thing of beauty. To this day, I still bitterly remember this project (you can in fact still see it over here, as I kept the Ravelry project page with all my pictures). But one of the downsides of such an elegant design with careful attention to details is that its construction is very intricate and require significant focus every small step of the way. And unfortunately for me, I was not prepared for this the first time around. A series of mistakes back to back caused frustration, anger and disappointment, and I ended up frogging the entire thing. Not to worry, although it took a few years, I ended up using the yarn for another wonderful sweater from the same designer (remember my Stormy Seas?), but I was still left with a bitter taste.
Since then, time has smoothed things over and I now felt ready to tackle this pattern again, stronger from past experiences. Tedious work folks, but I made it. and in less than two months, to boot. I worked it exactly as per pattern, except for 3 small details – I did not use a provisional cast-on and picked up stitches for the neckband instead, I picked up the neckband stitches in the main colour instead of CC1 and lastly I changed the decrease rows on the sleeves for a tighter fit. As always, you can find all the details on my project page so please feel free to head over that way. Now, that we’ve gotten that out of the way, let’s talk about the yarn.
This time around, I decided to stick to the needle size and yarn weight recommendation, and I went for a combination of Berroco Modern Cotton DK in color Piper as the main colour and I opted for a skein of Cloudborn Fibers’ Pima Cotton DK for CC1. And because we can never completely forget our first love, I ended up choosing to feature another handspun this time as CC2. This colour combination gives me beachy vibes with the sandy main colour and the Caribbean blue sea hue of the handspun. The purple adds a touch of warmth to the mix giving it wild sunrise vibes.
While I absolutely adore the colours, I was a little bit anxious at how this was going to wash. You know me, I put almost everything in the washer and dryer because if I don’t, I am likely not going to wear it. And while the two commercial yarns I chose are all cotton, the handspun is a merino-tencel blend. I was expecting a bit of shrinkage in the wash, but I was hoping to avoid a felting mess. And fortunately for me, everything went as expected. The yarn was actually fairly fine, finer than the two cotton yarns I was using it with. And so the fabric was feeling a bit loose and airy. I sent the cardigan in the washer with everything else, and then sent it to the dryer on its own on on air fluff. And while it did shrink, the handpun knitted sections retained some stitch definition albeit a bit tighter and fuller and which showcases the blue tonal shades beautifully.
The finished cardigan is beautiful, soft, warm and so so comfortable, please don’t mind me if I just live in it for a little while.
Cheers 🙂
Plush toy galore
I’ve been hoarding books and toy patterns for years now, and although I find them so cute and cuddly and had all the intentions in the world to make cute adorable plushies for the little ones around me, I have to admit that I only ever knitted a toy once, roughly 5 years ago. So last month, I decided to change that.
I dusted my toy making books, dug through the yarn leftovers and odd skeins I couldn’t find a use for and started making. And low and behold, I ended up making many more than I thought I was going to. Without further ado, let me now present you my humble little plush toy collection.


Those squishy fluffy faces come from a few different sources, so please let me walk you through.
The two siblings were made using Susan Claudino’s Voodoo you love me? , a sweet and simple pattern I’ve really enjoyed making. The instructions are super clear, step-by-step and easy to understand. The big brother was made using an unknown, unmarked yarn ball from my craft room closet. It is most likely an acrylic yarn of some kind in a bulky or super bulky weight. The little brother was made using some Berroco Corsica cotton/cashmere yarn I had leftover from a little baby onesie I made a few weeks ago (more on that in another blog post!).
The bright pink and white bunny is actually a crochet project, which I actually rarely do, so it was a nice change of pace. The pattern is called Framboise, and it comes from a book called Tendre Crochet from Sandrine Deveze. Now I wish I could link you the Ravelry page but it seems that book has not been catalogued right in Ravelry, and some of the patterns contained in the book (like this one, which also happens to be on the front cover) is not listed. But a quick search on Amazon or your preferred book store and I’m sure you’ll be able to find a version of it, it has been translated and distributed in many languages/countries I believe. I made this project using again a couple unmarked, unknown skeins of yarn that look like they’d be a cotton blend in a worsted weight. Now although the patterns provided in the book are all just adorable, I have to admit I wasn’t a huge fan of the construction of this one, as it makes us crochet the body and the head separately and then sew them together. Next time I make this, I’ll start with the legs and body, then switch yarn colour and work the head seamlessly, adding the filling as I go.
The big guy is Hugo, the couch potato monster. It comes from Rebecca Danger’s Big Book of Knitted Monsters. This is a favourite of mine, I’ve cherished this book dearly for years, even though I’ve only ever knitted one before. I made this new one in wonderfully soft Noro Shinryoku. Hugo is a super easy pattern and the final toy is just *SO* squishy!!
The last one I made is the star shaped little guy with a blue hat. This pattern is called Knubbelchen and is a free Ravelry download. I made this one out of leftover Universal Yarn Bamboo Pop and it is just so soft and squishy! The one thing I’m a little sad about is that I didn’t look at the finished measurements of the doll first, had I known how small it was going to be I would’ve kept knitting! But anyways I’ll keep that in mind for next time.
For obvious safety reasons I’ve used safety eyes for all the dolls. yardage info is available for the yarns I could track (i.e. not the unknown/unmarked ones) ok my Ravelry project pages here, here, here and here.
Hope you guys are all fully enjoying the last bits of spring, and I’ll talk to you again real soon. Cheers 🙂
Twinning
So… something happened. I made a sweater, and it was just so wonderful and perfect and the colours were so amazing that I decided to make another one. A smaller one. A tiny baby one. And I couldn’t be more happy about the result ❤️


So first let’s get the basics down. This pattern is made (once again) by Beatriz Rubio from Sambaknits and it’s called Vinicunca. It’s a wonderful dropped shoulder cozy oversized sweater with tight sleeves. I made it in Berroco’s Modern Cotton DK in colour Gadwall. The contrasting colours are a bit of a closet clean out, I used a mix of what I had in a similar gauge that would fit the colour scheme I was envisioning. There’s Elsebeth Lavold Hempathy in there, Knit Pick’s lindy chain, Katia rustic silk and a couple basic cotton yarns to complete.
I made this sweater in size 2, no swatch, I just eyeballed it. Big mistake. But let’s be real, I just never swatch. I’m not a swatcher, never been, and probably never will be. I don’t care much for gauge, and I like to have variety in my closet so in my hand knit section, I’ve got sweaters of all sizes ranging from dramatically oversized to pretty darn snug, and I kinda like it that way. So back on topic, I didn’t swatch. and I probably should’ve. Because… I’m a tight knitter. And I liked the oversized look of this sweater. So… I ended up blocking the sh*t out of this one until I reached the desired size. NOT RECOMMENDED 😅 but I did. And you know what? It turned out just fine. But I made a slight adjustment for the mini version, and I made a mental note to myself for any other future iterations of this sweater to size up on needle size to 4mm because for this sweater, gauge matters. A lot. Anyways other than needle size I didn’t change much to the pattern. I omitted the sleeve decreases and changed up the number of repeats for the contrasting colours to jazz it up but that’s about it. All the details are on my Ravelry project page as always, including precise yardage, mods, etc.
For the mini version, I did end up making quite a few ajustements, as the pattern isn’t made for kids. It’s not perfect and if I do this again I left plenty of notes on my project page to do a better job next time but overall, I’m still pretty darn happy with the result. And the little lady too, so it’s all good.
So that’s all I got for today folks, I’ll see you again real soon 😉
Colmena Shawl
Gosh, has it already been two months already? I’m sorry…
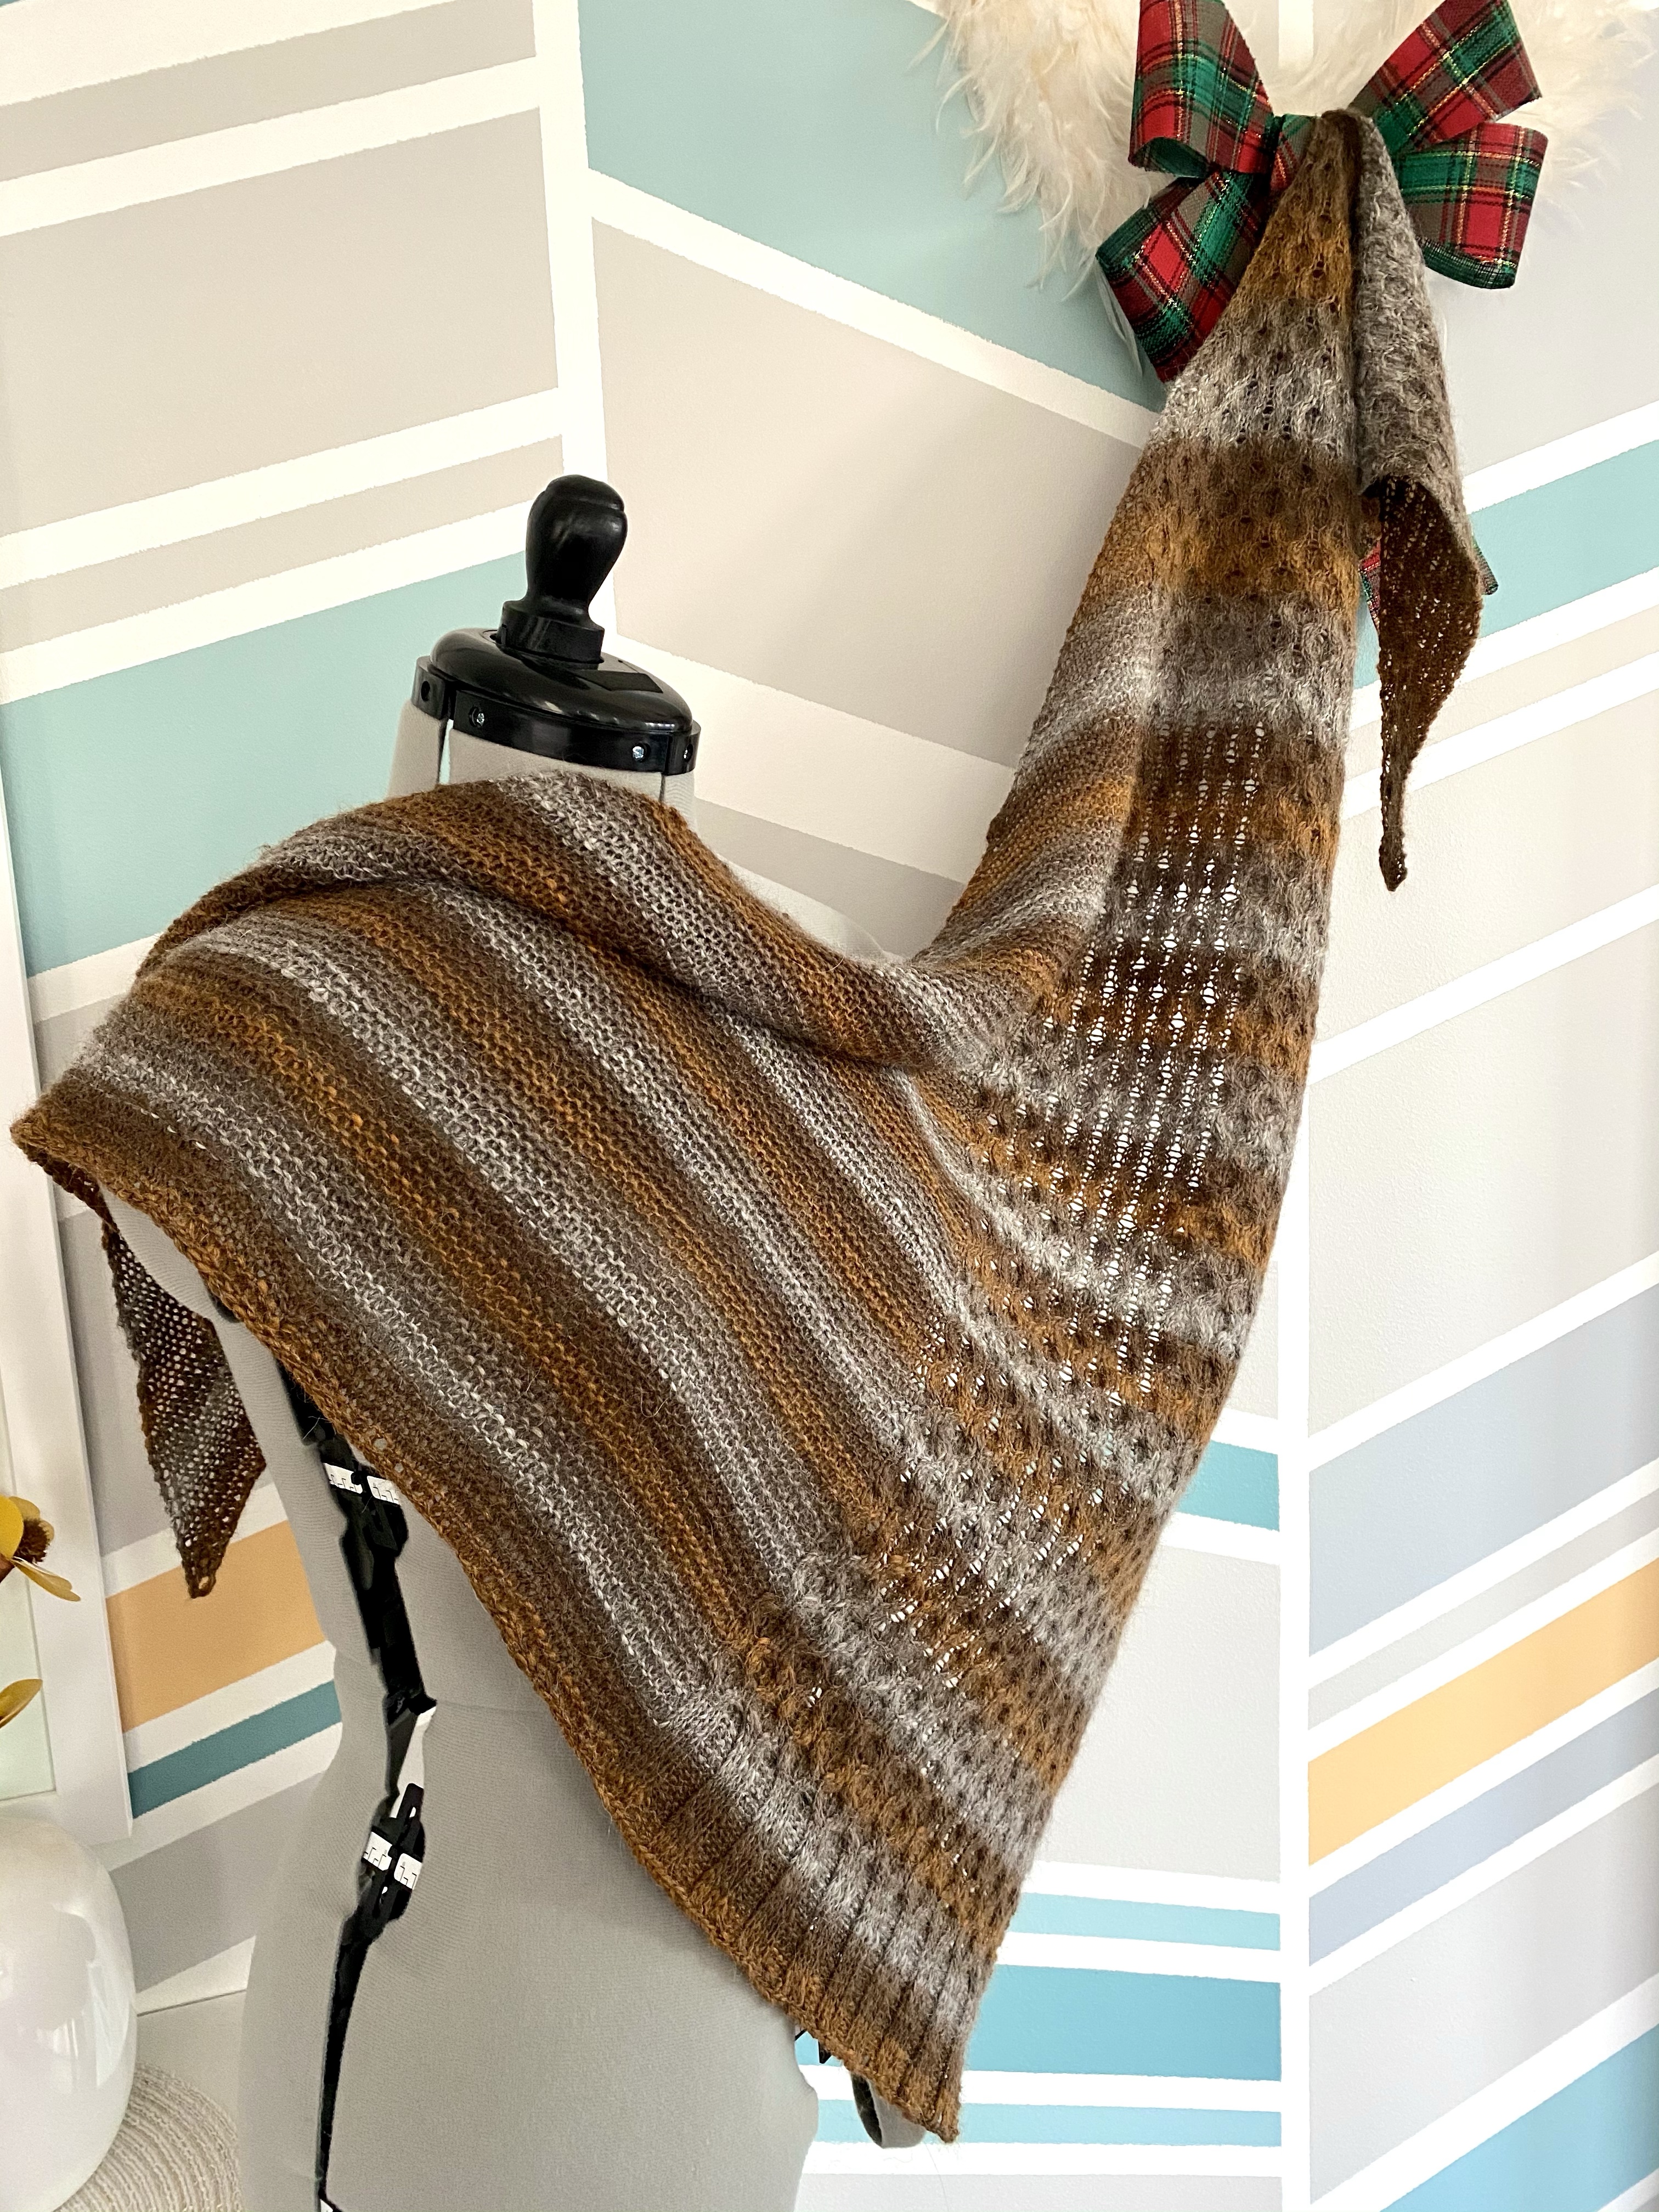


But I’ve been working diligently on this beauty here, and it’s been taking most of my time as I’m not very efficient working cables. Resulting in me being a whopping 3 weeks late on this test knit. Beatriz, my deepest apologies!
Ok, let’s recap here. I signed up in September for another test test knit for SambaKnits, this beautifully textured Colmena Shawl. This is not my first rodeo, I’ve done test knits many times. What I didn’t realize at first though is that the entire textured section is all cables. That’s a lot of cables. And don’t get me wrong, I’ve done cables before and I know how to work them. But I’m not especially good at it. They seriously slow me down, leading me to greatly underestimate the time it would take me to knit this. But let’s pass for now abs let’s talk specs.
This shawl pattern is written for worsted weight yarn, and as always Beatriz was a charm letting us do yarn substitutions. I went for a couple skeins of Motley from Sugar Bush Yarns I had in stash. It is marked as a sport weight yarn but it’s a very thick and thin single that feels more like a DK to me. First surprise: it’s actually a self striping, which is not what I was expecting. How come I didn’t realize this?! Anyways, I decided to roll with it and knit the shawl with appropriately downsized 4mm needles.
I had committed to using the full two skeins I had, saving a third one for a matching hat or a pair of mittens. I did just that by adding one more full repeat of section 4, and working section 5 a total of 8 times instead of 4, all in all adding about 18 rows to the original pattern. I think I did great maximizing the yardage I had, though I ended up playing a fans a yarn chicken in the end abs lost – by about 10 stitches. So I had to borrow 12 inches of yarn from the reserved hat/mitten skein to finish binding it off.

All in all, it took me about 2 months to work through this shawl, which literally is FOREVER for me (thanks to the cables) but I regret nothing. I love this shawl, the feel of it, the colour, the texture, and given the choice I would still do it all over again. If you’re interested please do feel free to check out my Ravelry project page for all the details, and now I’ll hopefully be moving on to Christmas makes (Gosh I’m so so late this year!!)
Autumn feels
In the blink of an eye, the warm and sunny days have been replaced by gray, rainy and chilly fall weather here in Quebec, and I just kind of find myself confused asking “Where did summer go?” “How can it be mid-September already?”. Am I the only one feeling that way? I think covid is affecting our time perception in strange ways!
Anyways, the colder weather has prompted me to start working on more weather-appropriate projects, including this colourful Brioche Vest from Purl Soho knitted in Noro’s Shinryoku yarn.


I made this vest in size 33 1/2”, except that I did not switch to size 5 mm needle as per pattern instructions as the vest was already more than big enough on the 4.5 mm needle. The only couple small modifications I made on this pattern were to sew the sides fully and to leave the shoulder stitches on hold instead of binding them off and closed the front and back with a 3 needle bind-off. The pattern is clear and straight forward, although if I do make this again I think I might work it in the round and separate the front and back after the first set of decreases instead. Interestingly enough, the one thing that attracted me to this pattern was the slits on either sides, but after trying it out on me (and this may just be due to how the fabric falls with the yarn I used) I did not like the fit of them on me, I thought it made me look like a potato bag -which, as you can imagine, was not the intended goal. So a decided to sew the sides fully to hug the hips down instead.
Also, I have to say that I am not a huge of the length/shape of this sweater. Had it been a tad bit longer, it would’ve been ok – with added waist shaping. And would it have been shorter, it would’ve made an amazing boxy cropped top. But I find that this one sits at a very weird length on me, so if I make this again, I will probably make adjustments to the length and possibly also use a slightly smaller yarn with a bit more weight and body – I think that would suit the pattern much better. And I really want to clarify that this is in no way a critique of the pattern itself (it is well written, clear and more than anything – free!!) but more of a word of caution to myself if I want to attempt this a second time.
Anyways, moving on to the yarn now. I had bought this yarn a little while ago, and although I am usually not a Noro fan, I thought would give it another try since kind of liked the colour scheme of the Akoya Haze colourway. Well, as luck would have it, I am still not a fan. The yarn is soft, but a bit too poofy and frail for me. And the colours didn’t knit up as I expected they would. So either I really am not a fan of Noro yarns period or maybe I just haven’t found yet what kind of projects these funky textured and colourful yarns should be used for. Either way, there is still room for experimenting as I still have almost two skeins of this left, and we’ll see how things go.
Either way, all things considered, I think you’ll understand that although I can’t say this vest is a disappointment by any means, I just don’t seem to like it as much as I would’ve wished to. I am not 100% sure whether or not I will really wear this so I guess only time will tell! As always, all the details of this project are available on my Ravelry project page so feel free to take a look there if you’re interested, and don’t hesitate to reach out or share any of your experiences!
Have you ever made a project that you ended up having mixed feelings for? Did your first impression stay true or did you grow to like the project in the end?
Until next time peeps 🙂
Heyday Stripes
So something really fun happened this summer. I’ve been following the lovely Juliana from http://kleidermache.blogspot.com/ for quite a while, and when she posted a fabric destash on Instagram, I couldn’t resist getting a few pieces for myself. It’s not every day you get a chance to lay your hands on vintage fabric from Germany you know (especially in a travel-restricting pandemic..!!) and a few of those gorgeous fabrics were literally calling my name.

The first one that drew my eyes in was the floral on the left side, then decided to add a stiffer cotton stripe canvas to the package. At first I really thought I would use the stripes to make a pair of loose, wide legged beach pants. I was pretty sold on the idea, and while waiting for the package I started browsing patterns, trying to find something that would fit the image I had in my head.
But then, I completely changed my mind when I received the package. First, let me just say that when I got this in the mail, it felt even more exciting than Christmas! So much joy and excitement and happiness! Also, knowing how much I love pattern and stripes, Juliana added a few more in the mix, and a lovely note. I have no words to express how grateful I am! This package was everything I could have ever wanted and some more!
So once I could hold the stripes fabric in my hands, and after turning it over a few times and giving it a good wash, somehow, it just screamed “Dungarees” to me. I don’t know why… I don’t have any dungarees in my wardrobe. That’s not something I usually really wear. And I didn’t even have a dungarees pattern in my collection. I’ve been very well resisting the dungarees trend so far! But this fabric… Somehow… Was really calling for it. And in the same time period, a friend of mine also post a super cute picture of herself in blue dungarees. So that was it… I was sold. It had to be dungarees!
I had seen before the Heyday Dungarees pattern from MBJM, and I thought this might be a good start for what I wanted to do. I thought the loop and straps closure on the front was the cutest thing ever, and the pattern seemed simple enough. I did make a couple changes though, especially on the pockets. I’m not a huge fan of patch pockets on the front, so I dropped the chest pocket altogether and slightly altered the pattern to create side pockets instead. I also cropped the leg as I was working on a limited amount of fabric and didn’t have enough for a full legged one. With all that being said, here it is folks, in all it’s glory! My vintage stripes dungarees!


The Unfinishables
We all have some of those, right? Well, staying home a lot more recently has given me an opportunity to revisit those, and to put the final stitches on a couple projects I (really) should’ve finished long ago.
First off is this luscious green cardigan I’ve started in October 2017 as a test-knit for the lovely Anne, for her French Kiss cardigan pattern. Now I feel particularly terrible about this one because I’m the type who will not sign up for a test knit unless I know for sure I can finish before the deadline. As luck would have it though, many unexpected things happened during that time frame that prevented me from completing the test. I felt horrible and apologized profusely, but after the pattern was published I didn’t feel as much pressure to finish the project so I just left it there and forgot about it. I’m so happy (and relieved) it is finally done, and right on time too – the colour and the yarn are perfect for spring / summer.


I used about 6 and a half skeins of Nettle Grove yarn from Plymouth Yarn in the colour “Mermaid”. This yarn is an interesting cotton, linen, silk and nettle mix, and although I’m not a huge fan, I gotta say that the final washed fabric is actually pretty soft and has very good stitch definition. I pretty much followed pattern instructions exactly, all the details are on my Ravelry project page.
Second project I want to show you guys is my second iteration of the Dessine-Moi Un Mouton sweater by La Maison Rililie that I had started in December 2018. It’s no secret that I love this design, I’ve used it before to make my Spilled Wine sweater (and made quite a fuss about it), and I seem to always gravitate towards this design to showcase something special. First time was a gradient yarn set from Wonderland Yarns, and now this time it’s one of my very first handspun yarn, that I had attempted to use for a BlueSand Cardigan before but ended up frogging (the unsuccessful attempt is still documented here).


Just like the first time I made this sweater, I’m using a staple yarn for me, Cascade’s Heritage Solids yarn, but this time I went for charcoal grey. I also again worked on a modified gauge (since I’m using fingering weight yarn), though this time I made this sweater one size smaller, since I’ve lost a lot of weight since I made the first iteration of this sweater.
Overall, I am just SO happy at how this one turned out, and I really cannot wait to wear it!! It’s fun, it’s playful, it’s comfy and more than anything, it’s not on a needle anymore. As usual the details on yardage and mods are available on my project page so feel free to check it out 🙂
Cheers!
Third time’s the charm?
Or not. But then again, maybe. I just recently finished my third Askews Me Dickey from Stephen West, and although it definitely is my favorite one of the bunch, it is also the one that looks the least like what I was expecting it to? Just hear me out here.
Askews me Dickey is a DK weight brioche cowl pattern worked on 4.5mm needles. It is a very structured cowl with a long slanted neck and a very wide yoke. Here’s a picture of the two first cowls I made using this pattern, and you will immediately see what I mean by “structured”.


The two times I made this cowl in the past, it was always a black yarn in the background and a red or a purple-ish color on top, and both times the cowl turned out nice and firm, stretchy and comfy but slightly too large around my neck/face.
Be that as it may, I wasn’t planning on making a third one of this, because I don’t wear cowls all that often (and I just finished the lissome cowl that I’m very much looking forward to wearing), but while I was going through my box of leftovers for another project, I found a couple balls of leftover Eucalyptus yarn from Mary Maxim.
Most of you probably have no idea what that yarn is because it’s been discontinued for a while and I really don’t think it was all that popular, but I have used it twice in the past for a shawl and a cowl (made respectively in the gray & the natural color). For those who have never seen it, it’s an insanely soft and luscious yarn composed of 50% acrylic and 50% viloft, a natural fiber made from Eucalyptus. The yarn is super soft and pliable, it behaves a little bit like bamboo with a nice stretch but has a much heavier weight to it which makes it feel much more decadent. Honestly, I can’t even find the words to describe it – that’s just how much I love this yarn. Anyways, you can probably imagine that when I saw I had some of this leftover in two colors, I just HAD to find something to do with it, and since I had very little of both colors, I thought it’d be a great fit for a brioche cowl.
Obviously this yarn is much finer that what the pattern calls for, being a sport weight yarn rather than a DK. But knowing the cowl turned out a tad too large both times I’ve made it in the past, I thought it’d be perfect with this and a smaller needle. I settled on a 4mm, and looking back I probably should’ve went down to a 3.75 or 3.5mm needle.
Either way I knitted this up in just a few days since it is such a quick knit, but as I went, I realized that the very soft and pliable yarn was not responding very well to the structure of the cowl. I still finished it though, figuring that it might turn out ok once I had the yoke completed, but it really didn’t give any more body to this cowl. I looked at the finished product in dismay, I stuffed it in a bag and let it sit there for a few days before I came around to it. You see, I had so many expectations for this cowl and it just didn’t turn out the way I thought it would so I felt a bit sad, disappointed and apprehensive of how it would look like on me.


When I finally did try it on though, I realized that I liked this cowl all the same, and that it was OK that it didn’t turn out the way I thought it would. Lesson learned. Sometimes, life has a different plan for you. What do you guys think? Have you ever put time and effort in a project only to realize it didn’t become what you had envisioned? Did you get disappointed? Were you able to come around? Let me know!
And as always, if you’re interested in the cowl, feel free to check out my project page on Ravelry.
Cheers guys!
